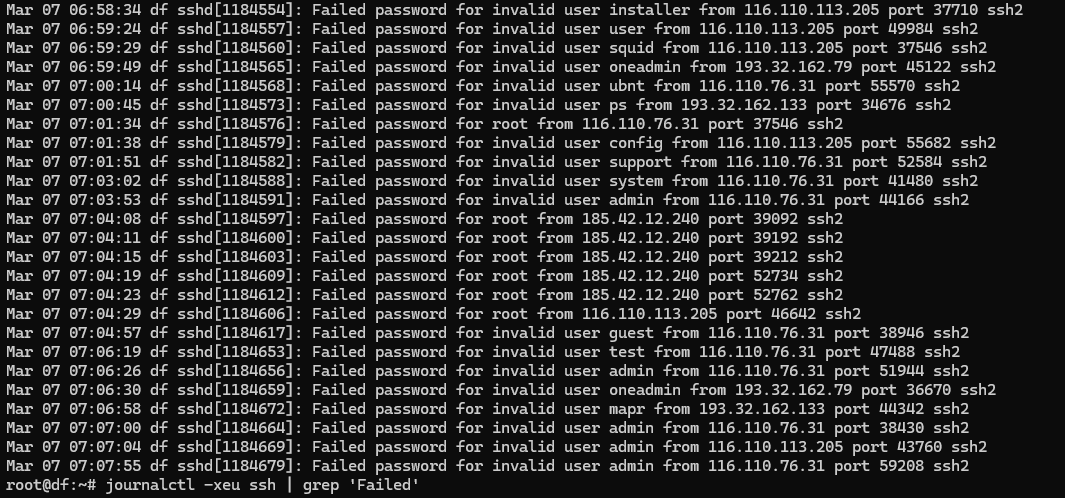
One of the frontiers of information protection is considered to be the identification and authentication subsystem, which provides secure access to resources. Since the Internet segment is constantly scanned by bots looking for vulnerable services, public solutions are under constant Brute-Force attacks.
Where weak mechanisms, and somewhere their absence at all lead to critical consequences and damage! In this article we will consider one of the basic authentication methods HTTP Basic Auth, its implementation and user configuration.

What is HTTP Basic Auth?
Authentication can be quite different in terms of types of authentication, when using: logins/passwords, signed tokens, certificates, TOTP codes, encryption keys, etc. And also by the way of architectural implementation: modules, services, external services.
In our case HTTP Basic Auth provides basic verification by login and password, being implemented as a module on web/proxy solutions. Where authentication credentials are passed in the header and encoded in Base64.
Authorisation: Basic dXNlcm5hbWU6cGFzc3dvcmQ= 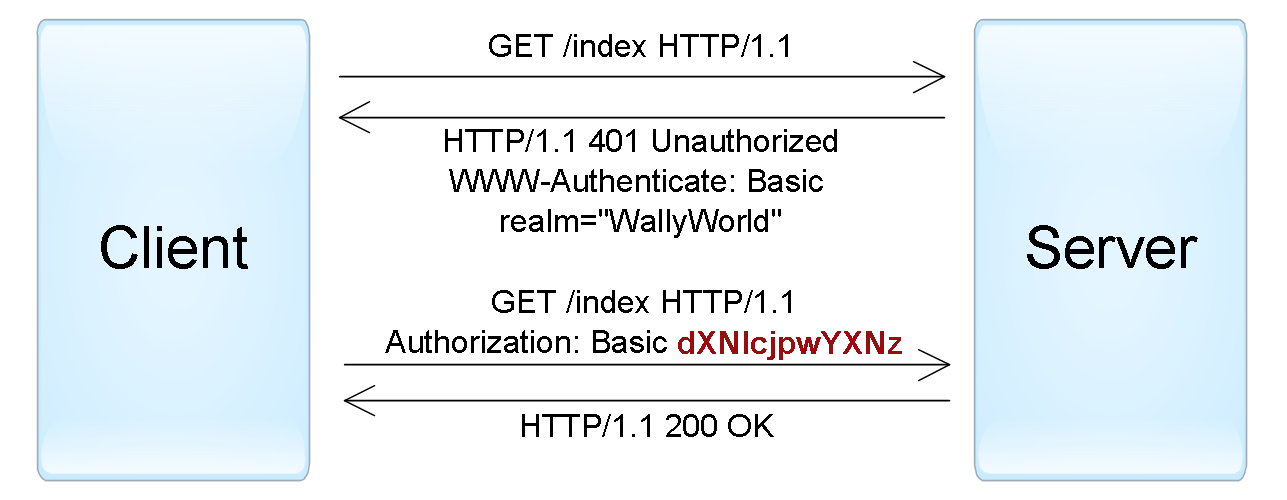
Please note that the transmission of this kind of sensitive data must take place via secure protocols! In this case, classically SSL will authenticate the server and form an encrypted connection. One of the disadvantages of this kind of authentication is weak passwords, which can be brute-forced by utilities like Medusa.
How to configure authentication?
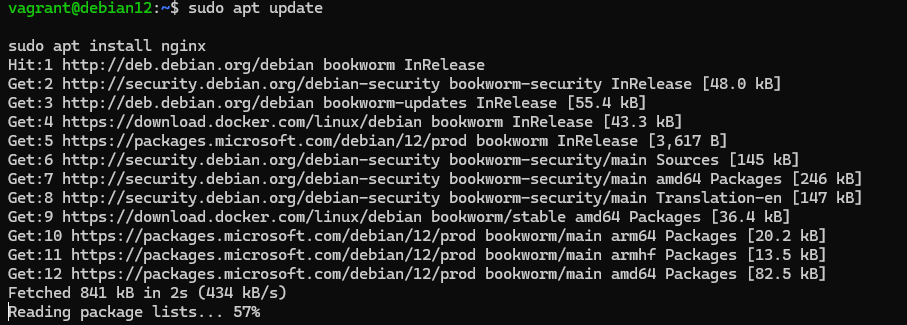
Let's consider a practical example of how to configure such authentication on nginx. First of all, let's go to the terminal and install all the necessary dependencies:
sudo apt update
sudo apt install nginx
Next we need to create a database with users where passwords will be stored in hash value format, for this we will install the utility and execute the commands:
sudo apt install apache2-utilsWhere each of the elements has a different value: the path to the future user database /etc/nginx/.htpasswd and the name of the user to be created - mike.
sudo htpasswd -c /etc/nginx/.htpasswd mike 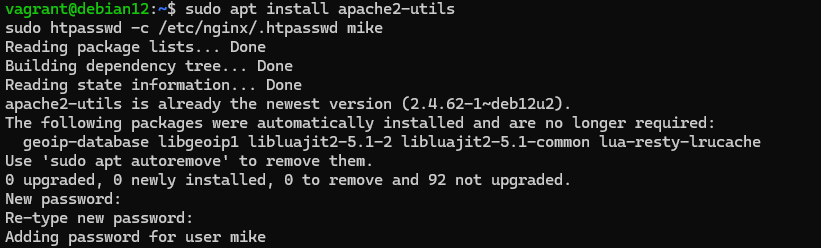
To create the second and subsequent users you need to remove the -c option that created a new file. After the user is in the database we need to go to the configuration changes. Let's find our virtual host:
nano /etc/nginx/sites-available/default By default, the file is called default, but in your case it may be different! Let's add a directive that will allow authentication before connecting:
server {

listen 80;

server_name example.com;

location / {

auth_basic ‘Restricted Access’;

auth_basic_user_file /etc/nginx/.htpasswd;

proxy_pass http://localhost:8080;

}

} 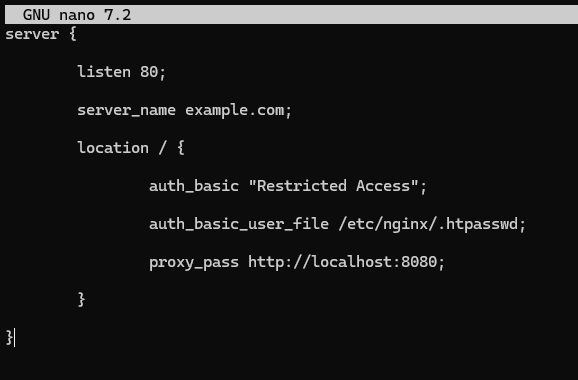
Authentication can be specified either on a specific web path or on the entire virtual host. To do this, place the auth_basic_user_file, auth_basic directives in the server or location blocks. Check the config before running, if it is correct, the service will restart:
sudo nginx -t && sudo systemctl reload nginx 
After that you can go to the example.com address and check the operability of the raised service:
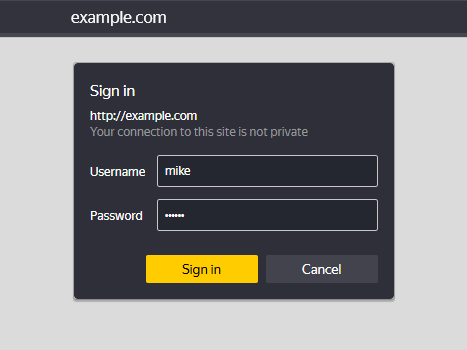
Great, when accessing the path / a directive is triggered, which allows us to check the file with users and process further packets when connecting. It is recommended to install fail2ban, which can limit the number of failed requests and prevent intrusion. In our knowledge base you can find configuration of other authentication methods Digest, NTLM, Kerberos and others!
If you don't have sufficient resources than you can perform actions on powerful cloud servers. Serverspace provides isolated VPS / VDS servers for common and virtualize usage.
It will take some time to deploy the server capacity. After that you can connect in any of the convenient ways. This infrastructure service is an integral part of the corporate network and security subsystem, allowing to implement authorisation, content filtering, as well as being a gateway for users to control visited resources.


