It often happens that a disc fails and you need to save your remaining data on it, to understand how this works we can take a look at the diagram below! A disc stores all data in binary form, meaning your photos, documents are a set of ones and zeros or files.
Therefore, the algorithm of work with it is as follows: we address the file through the operating system of our PC, then the request will go to the file system with a table of file addresses. At the address on the disc we will find the necessary segment of ones and zeros, that is our file.

When deleting the file is not erased from the disc, but remains with a note that the space is free for writing. That is, if the turn to this free block does not reach, the file will remain and will be available for reading, also it is necessary to take into account the peculiarities of work at a low level! Drivers may not allow to delete data completely from the first time, so it is possible to restore them at a lower level with special software.
Which programme to use to recover deleted files?
To recover files from a disc let's determine the type of your problem:
- If you just accidentally deleted data from the disc and it is not physically damaged, then use Recuva;
- If the disc is not displayed or works, but with errors, then Raw Recovery method is suitable, which is used in PhotoRec, R-Studio, TestDisk (partition and boot area recovery);
- If the disc has physical damage, it is advisable to first make a bit-by-bit copy via dd (Linux), Clonezilla.
In this article we will consider the first two, and for critical cases we have prepared a separate article!
Recuva to recover deleted files - free of charge
Install Recuva by pressing Win+X → Terminal/PowerShell(Administrator) and type the command:
winget install Piriform.Recuva  Screenshot №2 — Installation
Confirm the installation in the pop-up windows and wait for it to finish, then search for Recuva in search or on your desktop:

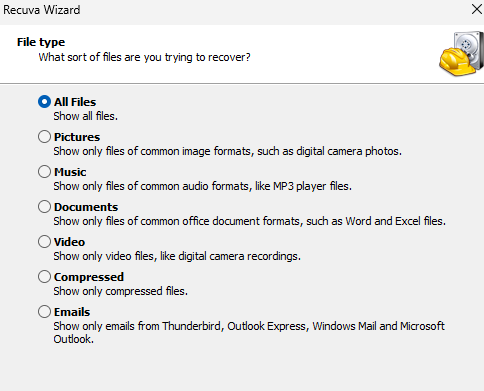
Select the type of files you need to recover:
Next, select the location or device from which you want to perform the recovery, which can be other drives:

Next, select Start, or for a deeper scan, mark the Enable Deep Scan checkbox:
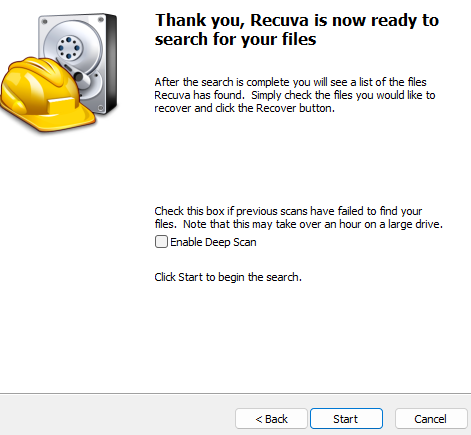
Wait for Recuva to look through your media and find the files on it that are not overwritten.
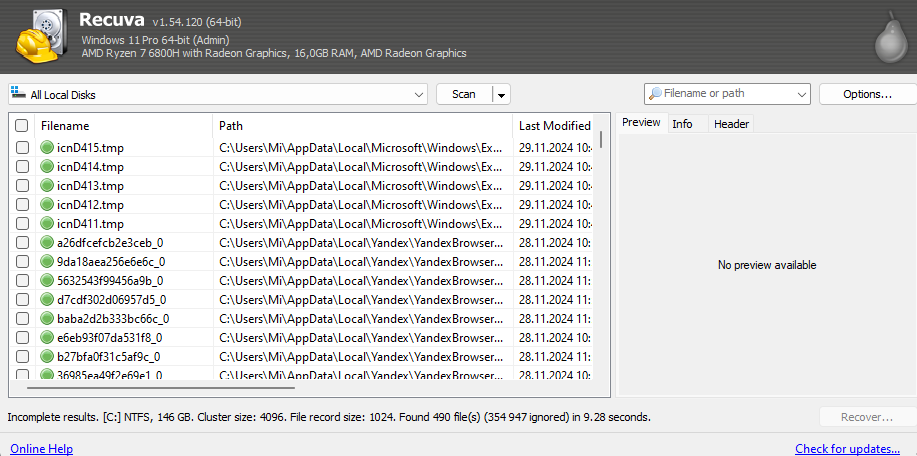
Then select only what you need to recover, or select all files. This method is only possible when the file system is not corrupted and all data is easy enough to find!
R-Studio - for file and file system recovery
Download the installer from an available website, preferably the manufacturer. After starting the installation, at a certain point the application will notify you about possible damage to the system, if not used correctly.
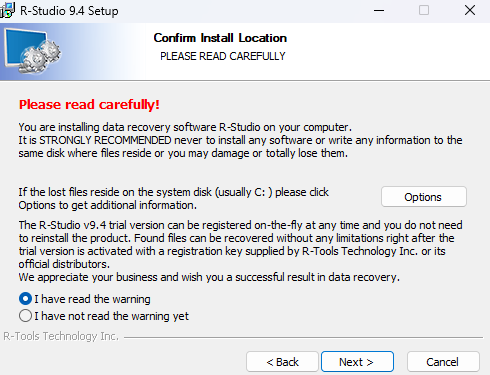
Because this is no longer just working with file systems, but also changing them, it is important to identify the system and normal discs in the process:
diskpart In the utility window that opens, type the command to output partitions:
list volume 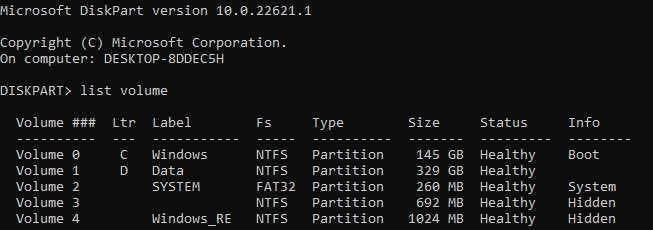
Windows is the system partition, the kernel lies there, if you need to recover data from it, then connect it to another PC and boot it separately!
For regular discs, everything is easier, you can continue to select Next and wait for the end of the software installation. In the window that opens, we can see brief information about the disc and its partitions:
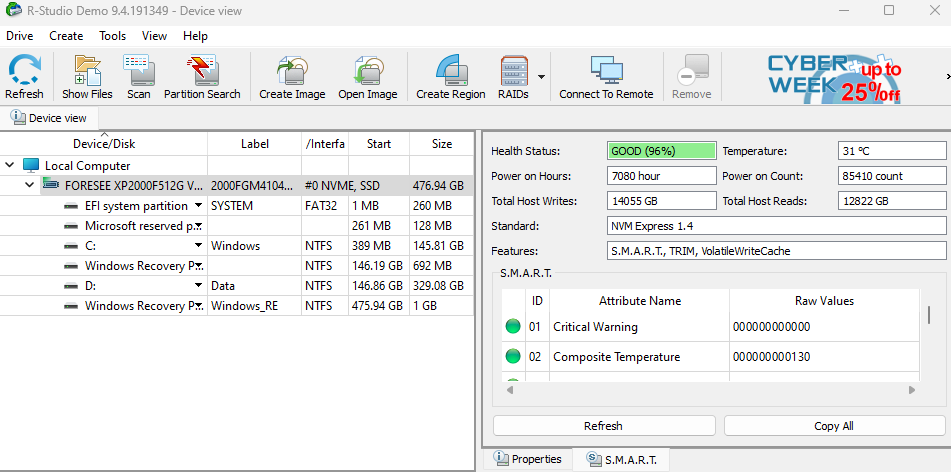
Select an entire disc or desired logical partition to search for lost files by signature:
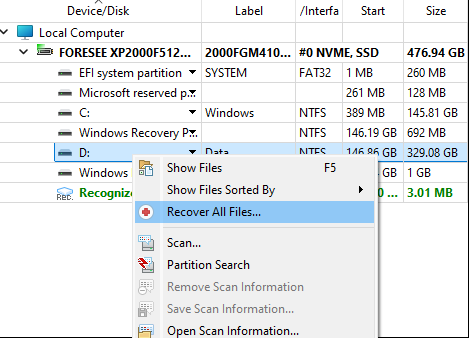
Then select the options that suit your requirements and choose a folder to save the results:

After that, wait for the end of the recovery process, since the software only has a demo mode available, recovery is possible for file sizes up to 256KB. However, it should not be a problem to find a solution for this task.
Recovering deleted files via Recuva allows you to find all sorts of hidden files, while R-Studio can repair and rebuild file systems and scan them in detail, so the data recovery process should be as efficient as possible! In this article we have reviewed the recovery of deleted files with freeware and commercial solutions!
Conclusion
Recovering deleted files from disks and other storage devices is a critical skill, especially when data loss can disrupt personal or business activities. Tools like Recuva offer a straightforward way to restore accidentally deleted files when the file system is intact, while R-Studio provides a more advanced solution for damaged disks and corrupted file systems. By understanding how file deletion works at the binary and file system level, you can maximize your chances of successful recovery. Always remember to act quickly, avoid writing new data to the affected disk, and consider creating a bit-by-bit backup for physically damaged drives to prevent further loss.
FAQ
- Q1: Can I recover files that were deleted a long time ago?
A1: Recovery depends on whether the deleted files have been overwritten. If new data has not replaced the old files, Recuva or R-Studio may still recover them. - Q2: Which tool should I use for accidental deletions?
A2: For simple accidental deletions where the disk is healthy, Recuva is usually sufficient and free. - Q3: What if my disk is corrupted or not recognized?
A3: Use advanced recovery tools like R-Studio, PhotoRec, or TestDisk to recover files and repair file system structures. - Q4: Is it safe to recover files from my system partition?
A4: No, it is recommended to connect the disk to another PC and perform recovery from a separate system to avoid damaging Windows or other OS files. - Q5: Can Recuva recover files from external drives or USBs?
A5: Yes, Recuva supports external storage devices, USB drives, and memory cards as long as they are accessible by the OS. - Q6: How can I increase the chances of successful recovery?
A6: Stop using the disk immediately, avoid installing new software on it, and use deep scan options in recovery tools for a more thorough search. - Q7: Does R-Studio have limitations in demo mode?
A7: Yes, the demo mode allows recovery of files up to 256 KB. Full recovery requires a licensed version.


