Firewall: configuring the server firewall
Instructions for configuring Firewall rules for virtual servers in the Serverspace control panel.
What is it?
Using a firewall directly from the control panel, you can control access to the server, network data packets. This option is not separately charged and is included in the server price.
There is currently a limit of 50 rules, if this limit is not enough for you, then you can increase it by request for technical support.
The network architecture
To avoid a conflict of firewall rules and their proper configuration, you need to understand the operating procedures of existing firewalls. First, you can set up a firewall for a private network. Secondly, for the server through the control panel. Thirdly, you can configure the internal firewall, for example, for Linux via iptables, for Windows - built-in.
For incoming packets, the network-level firewall (if any) will be the first to apply. If the packet has passed, then a firewall at the server level will be applied, and the internal software mechanism will be used last. For outgoing packets, the reverse sequence will be applied.
We do not recommend the simultaneous use of a server-level firewall and an internal software:

Creating a rule
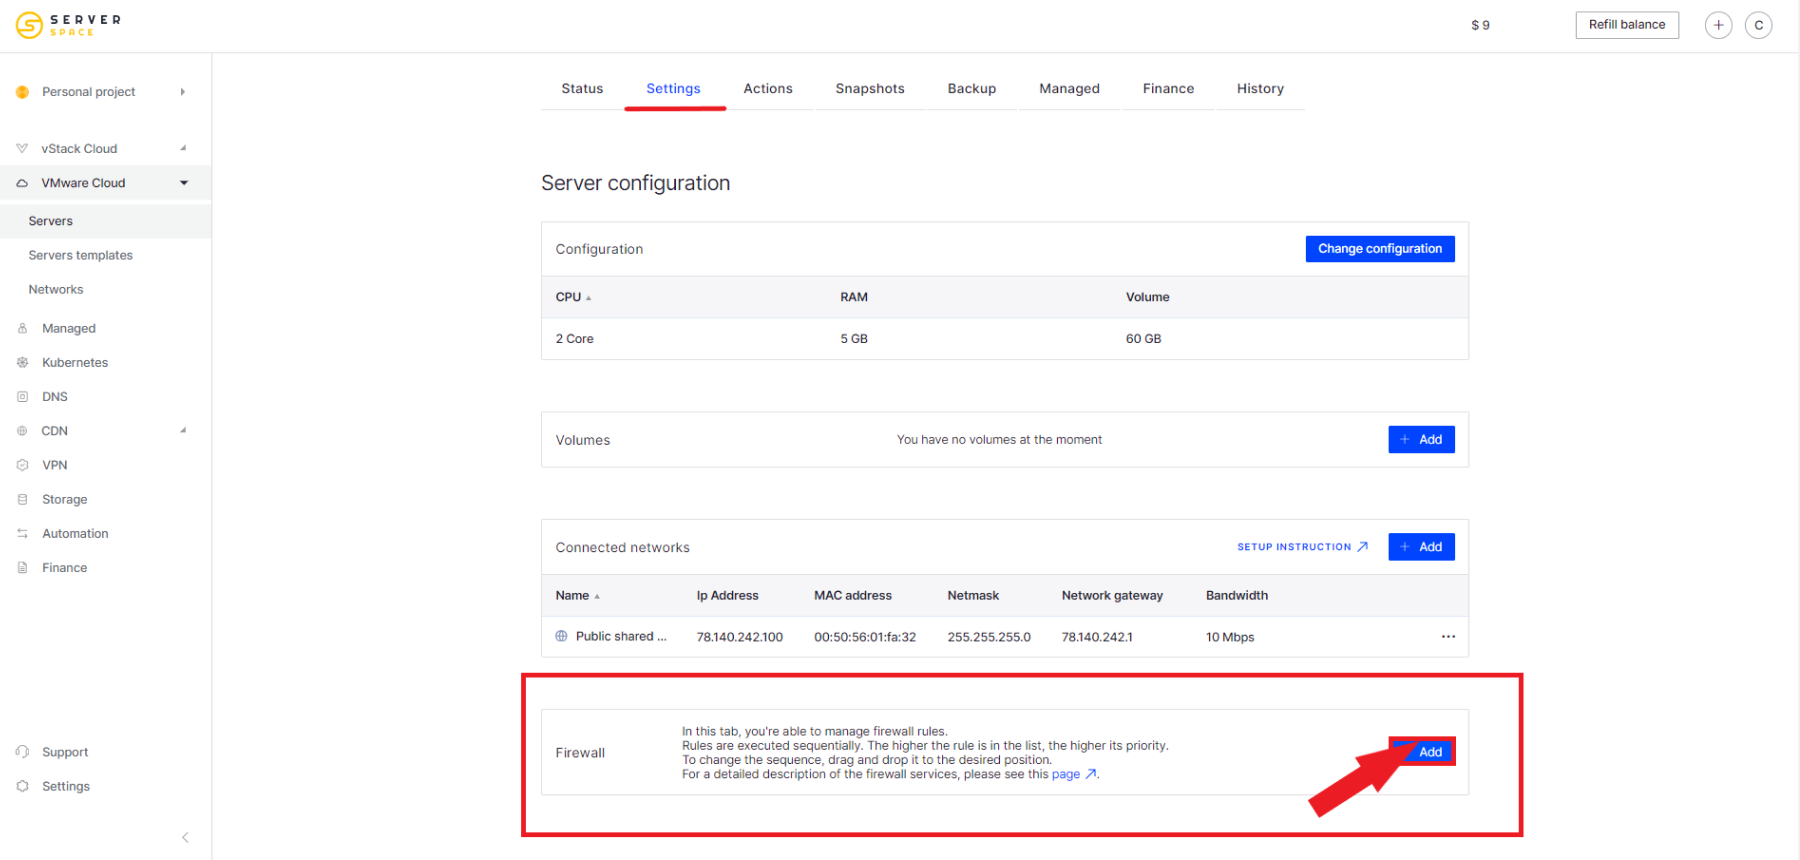
The firewall configuration is available for all VPS and is located in the server settings in the Firewall section.
Important:
- the order of the rules matters, the lower the order number of the rule (the higher it is on the list), the higher its priority. You can change the sequence of rules using Drag and Drop by dragging the rule with the left mouse button to the desired position;
- by default - all data packets, both incoming and outgoing, are allowed.
To create a rule, click the button Add:

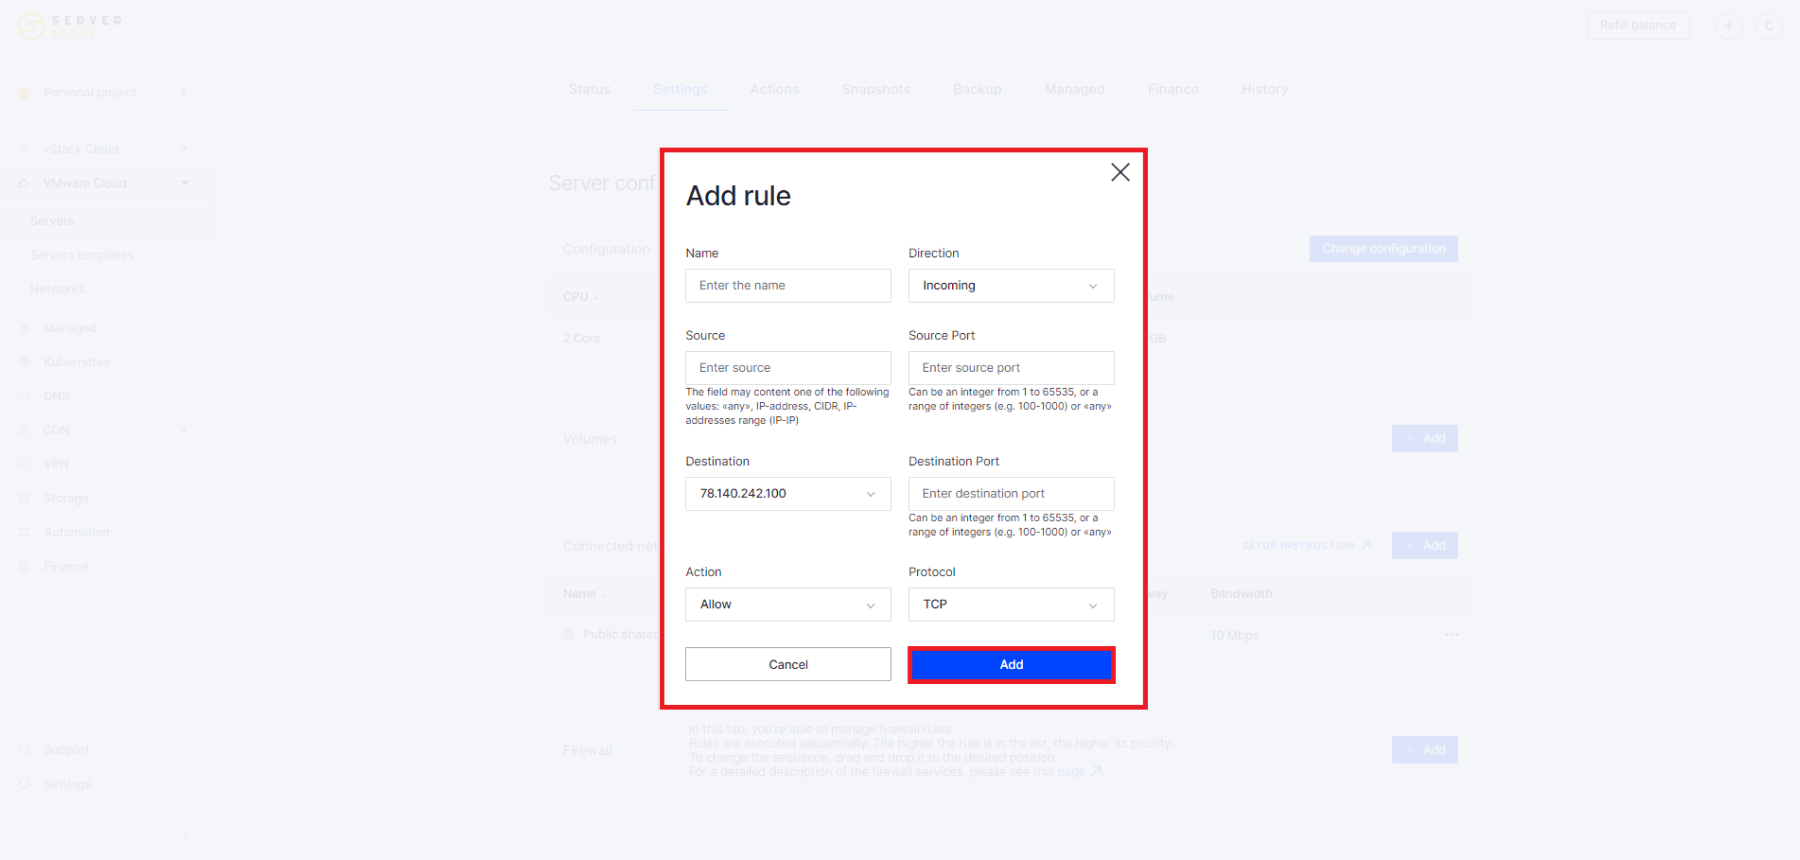
A window for adding a rule will open before you. These fields must be filled in:
- Name - a user-friendly name (no more than 50 characters), as a rule briefly describes the purpose of the rule;
- Direction - The direction of packets for which you want to apply the rule takes one of two values: Incoming or Outgoing. Incoming - the rule applies to incoming data packets, Outgoing - to outgoing ones;
- Source/Destination - depending on the direction, it contains the IP address of the server or one of the values: IP address, CIDR, range of IP addresses and any;
- SourcePort/DestinationPort - when choosing the TCP, UDP or TCP and UDP protocol, it is possible to specify the port, port range, or any;
- Action - the action to be applied takes one of two values: Allow or Deny. Allow - permission to forwarding data packets; Deny - prohibition of forwarding;
- Protocol - protocol type, ANY, TCP, UDP, TCP and UDP and ICMP are available.

To create a rule, click Add.
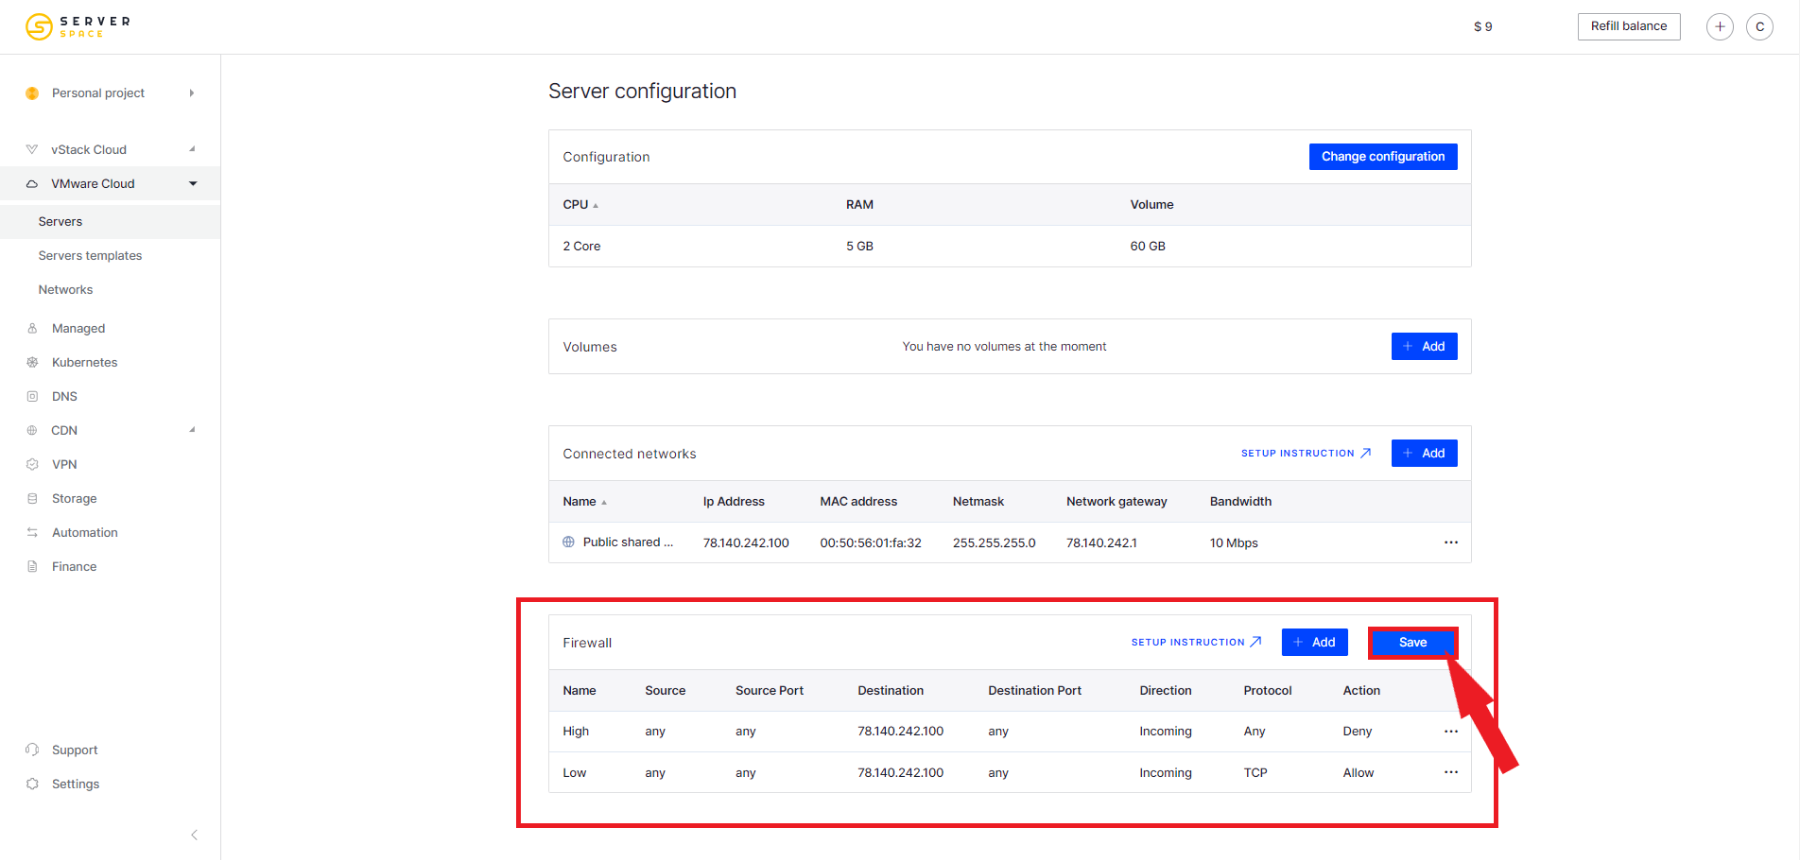
For the created rule to take effect, you need to save the changes using the button Save. You can create several rules and then save everything at once.

The priority of rules
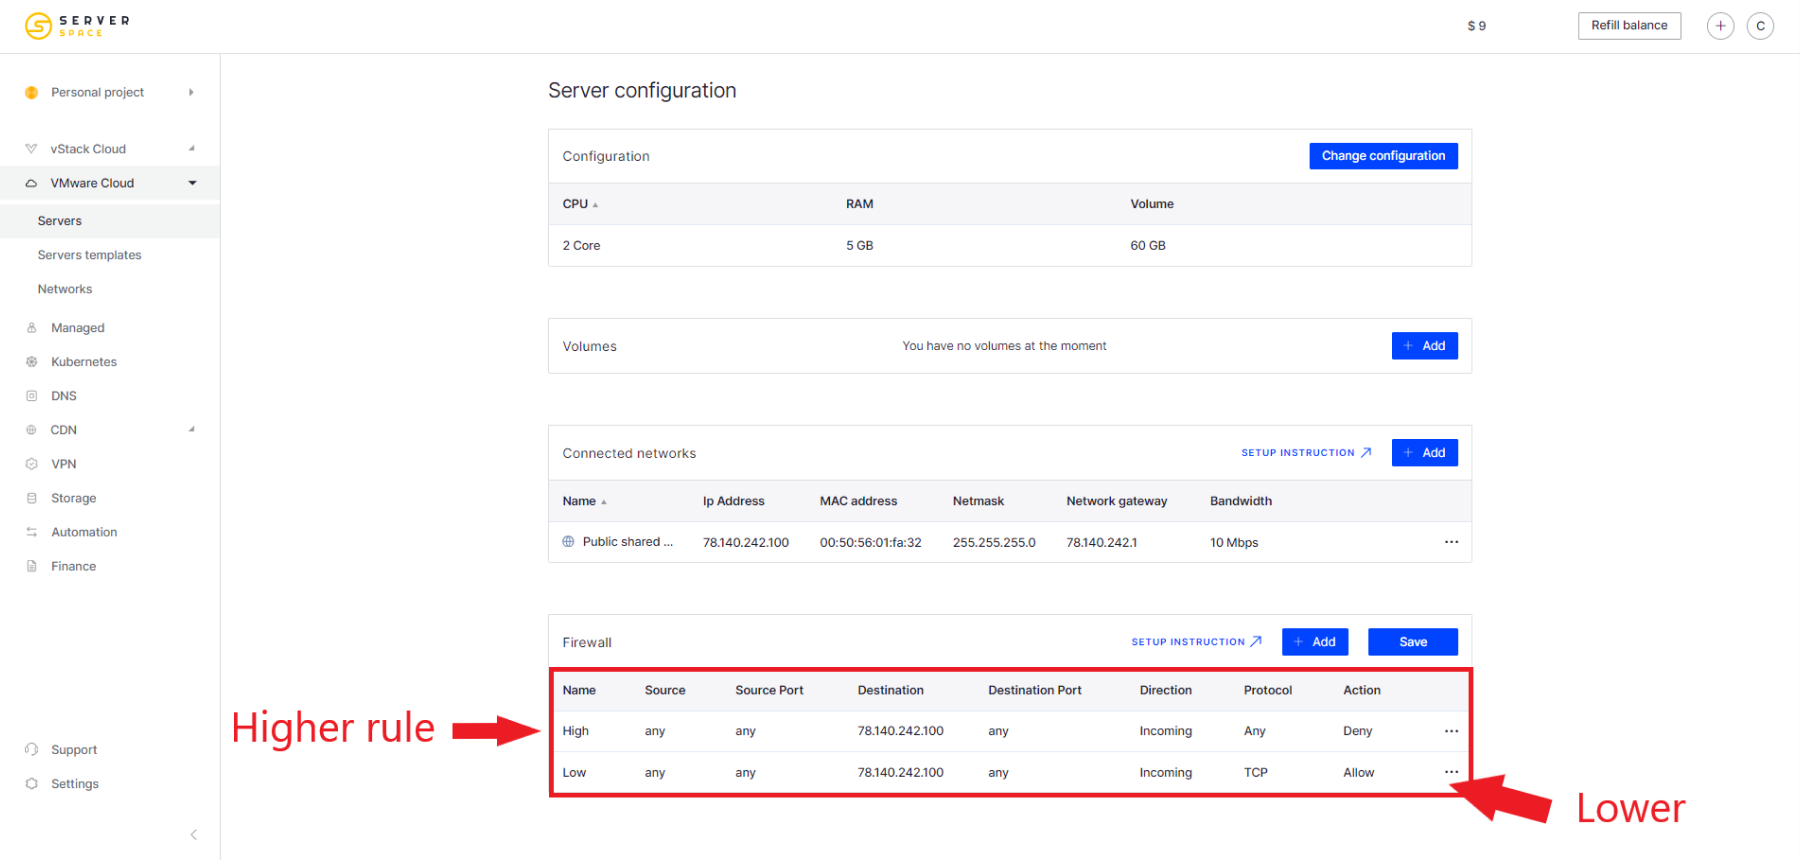
The lower the sequence number of the rule (the higher it is on the list), the higher its priority. For example, after a prohibition rule has been created for all incoming traffic, create a rule that allows you to receive incoming packets on port 80 of the Tcp protocol. After saving changes with this configuration, this port will also be unavailable, because the prohibition rule has a higher priority.

To change the priority of rules, use the left mouse button to drag the allowing rule to the first place and save the changes
After saving, the sequence numbers of the rules will change, and their priority will also change.
 700
300
 700
300
 700
300


