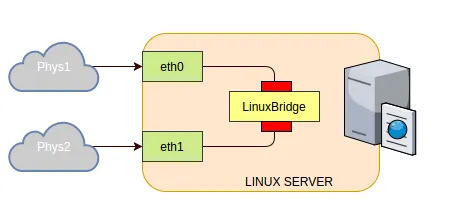
Network bridging is a type of network device interface operation that connects networks at the link layer, allowing nodes and endpoints to communicate between the connected interfaces. The way it works is that a new logical interface is created on the device, then two or more physical or virtual interfaces are connected. Packets then flow freely in two directions, forming a single channel environment.

Which can be useful when adding a new device to an infrastructure, when a switch is not available, or combining with containers or virtual machines.
What is Linux Bridge?
In the context of the Linux family of operating systems, a bridge is also a logical device that resides in the Linux kernel and realises the operation of the bridge in software. The principle of operation is exactly the same as described earlier, all link layer packets are freely transmitted through the Linux Bridge by controlling the network interfaces.
However, there are differences. In Linux Bridge supports packet switching table and STP protocol operation to neutralise loops. Which is a significant advantage over a conventional bridge, because in Linux, the bridge acts as a switch. Where a conventional bridge is a logical repeater that simply translates packets between ports.
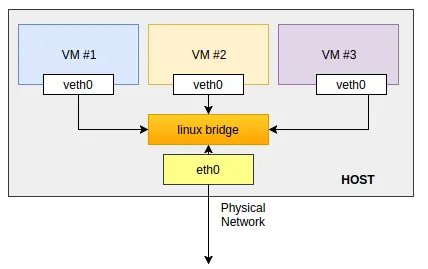
Quite often this technology is used when building a single network with virtualized environments in the form of virtual machines and containers. Let's consider the connection scheme:

Containers are deployed within the OS, which have their own network interfaces and configuration. The eth0 interface is also presented on the machine side. To organise a single channel environment on the host machine, a virtual interface is raised in bridge mode. Which unites emulated veth0 and host eth0.
Create Linux Bridge
All steps in the tutorial can be performed on powerful cloud servers. Serverspace provide isolated VPS / VDS servers for common and virtualize usage!

It will take some time to deploy server capacity. After that you can connect in any of the convenient ways. Let's return to configuring the bridge for network interfaces and open the terminal of our server. To view the current interfaces we will write the command:
ip a
As we can see now there are two interfaces enp0s6 and enp0s5, which are currently connected to the endpoint device. They function on the principle of receiving packets only from their subnet and their link domain. In order to create a bridge it is necessary to install a package that will allow you to control the device:
apt install bridge-utils -y 
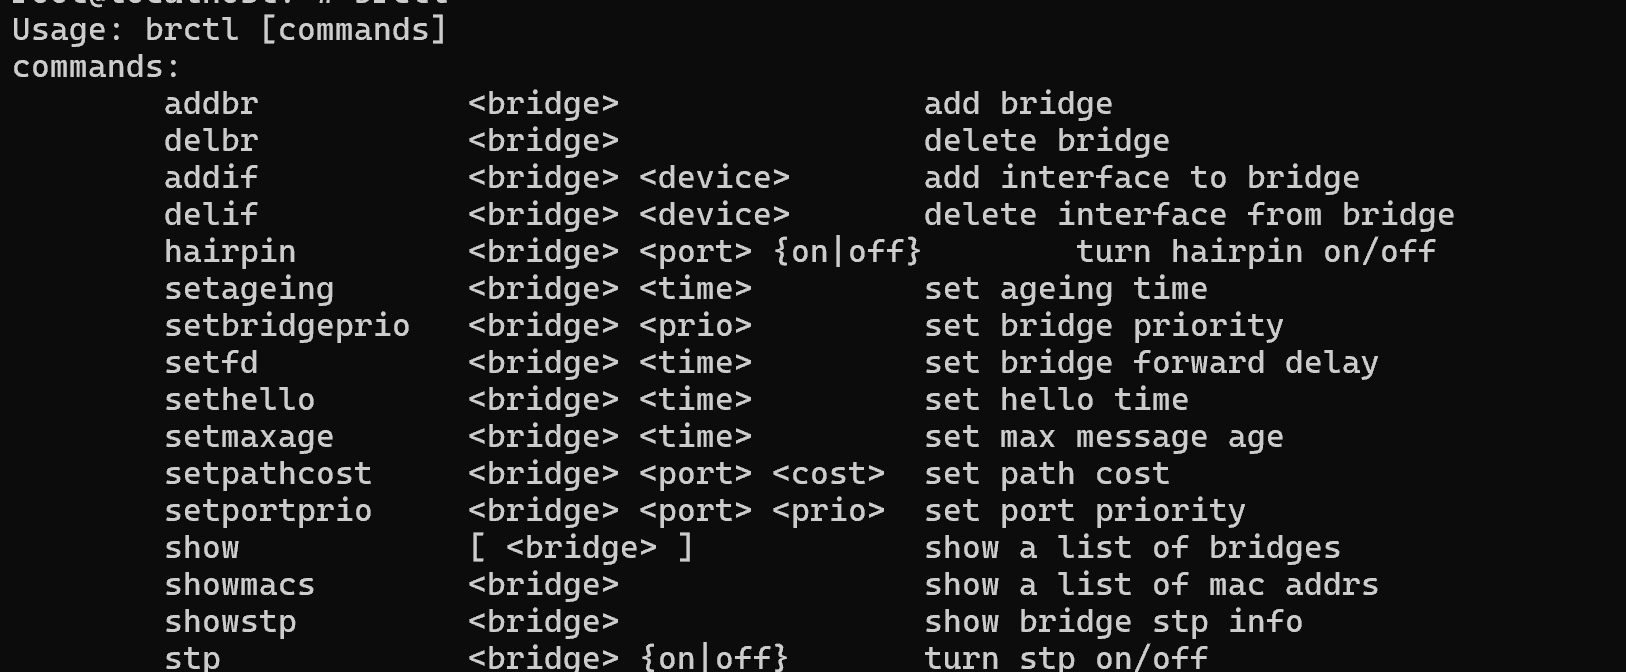
Let's familiarise ourselves with the basic commands to work with, for this we will prescribe:
brctl 
Let's consider the main functionality of the utility:
- addbr/delbr possible to create and delete a bridge;
- addif/delif to add and remove an interface;
- setfd option to set delay on frame forwarding;
- show will show the number of bridges;
- showmacs will show the list of MAC addresses in bridges;
- hairpin concept allows you to use the bridge/switch interface to communicate with other devices, instead of using the MAC address;
- stp allows you to enable the loop neutralisation feature.
Let's imagine that we need to unite two networks into a single channel environment and the bridge should act as a switch, for this purpose we will create the bridge itself:
addbr bridge1 
After that we can add the necessary interfaces for communication with the addif command.

Add the enp0s6 and enp0s7 interfaces using the commands below:
brctl addif bridge1 enp0s6 enp0s7 To neutralise loops, we will connect the STP protocol to eliminate redundant connectivity:
brctl stp briedge1 onAfter that, let's see what changes have been made:
brctl showOptionally, you can configure the delay for packet forwarding by command:
brctl setfd 10 After that, the frames will be sent with a 10 second delay and will be available on the other side to the devices! These solutions allow you to federate channel environments, but you need to be careful when using them. Because if a malicious virtual machine is attached, the infection can quickly spread throughout the network. Relevant protection measures must be taken using the appropriate technologies.


