Time management in information-computing systems is crucial for a variety of functions, including electronic digital signatures, TLS/SSL connections, real-time machines, and automatic process control systems. Without precise time synchronization, many services that rely on secure data transfer over HTTPS would not be functional. Furthermore, monitoring application logs for systems and administrators would become significantly more challenging, as understanding the exact timing of events is often essential for troubleshooting and analysis.
To address this issue, the Network Time Protocol (NTP) was developed, providing a standardized solution for accurate time synchronization across devices in a network.
What is NTP and how does it function?
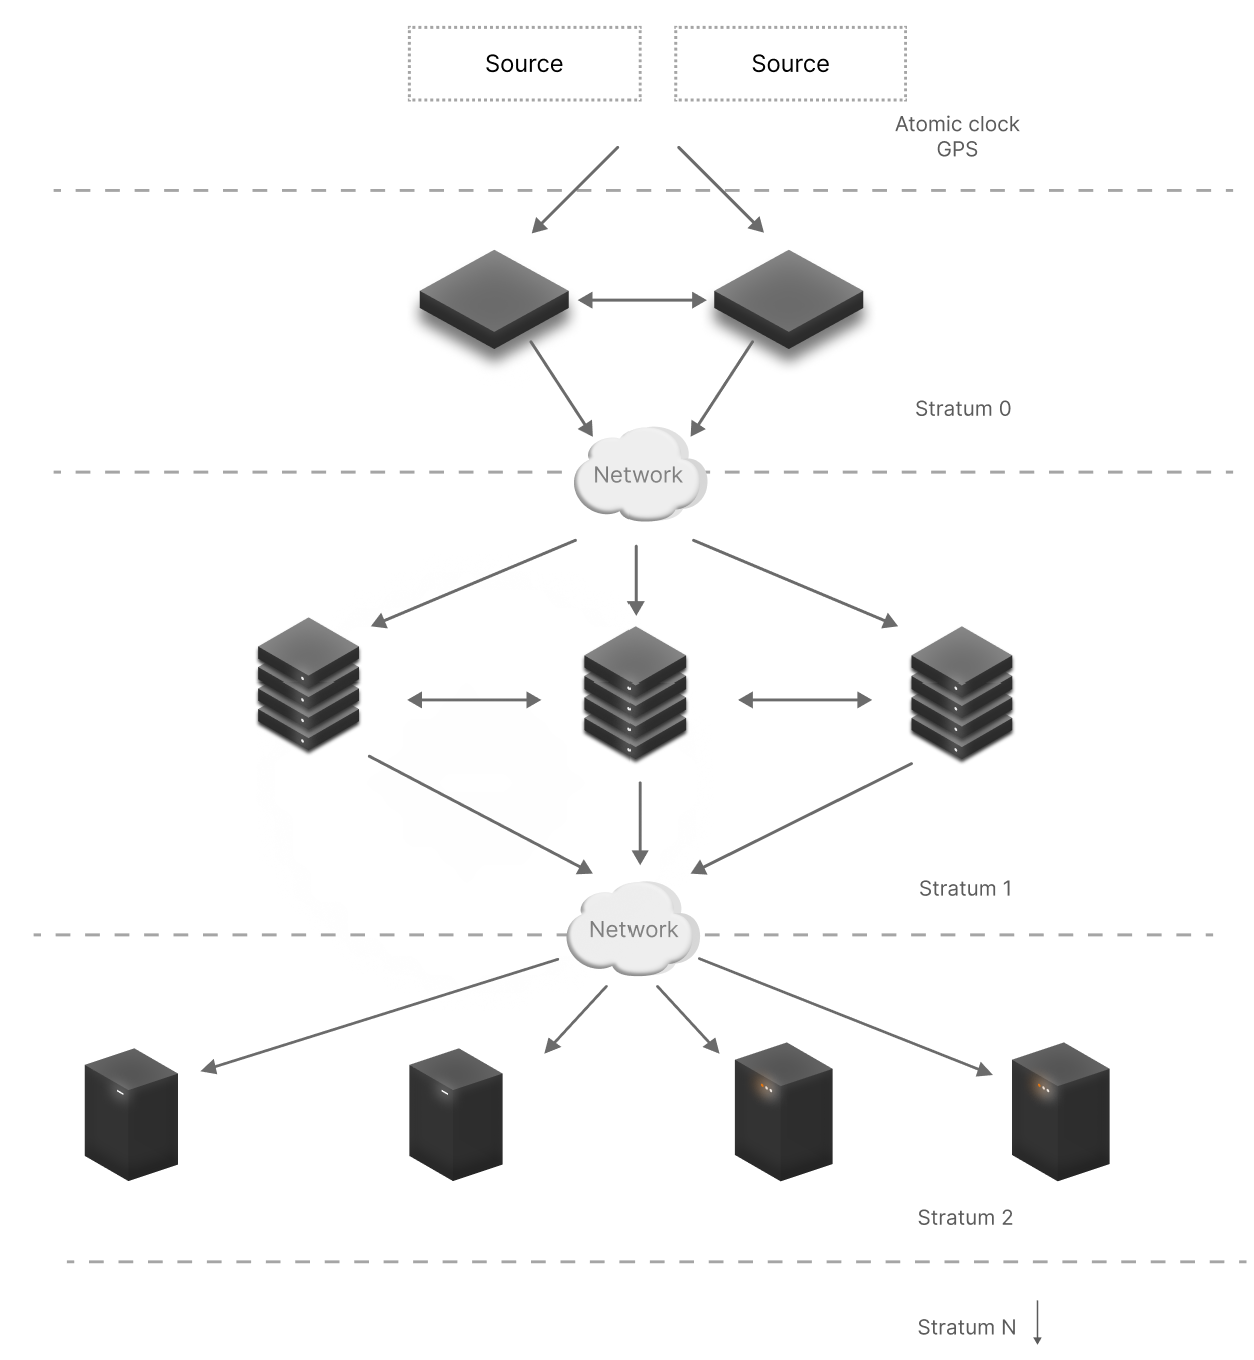
NTP (Network Time Protocol) is a protocol designed to synchronize time across various devices using a client-server model. It operates within a tiered system, where top-level servers (Stratum 0) supply time data to secondary servers (Stratum 1, 2, etc.). These secondary servers then transmit the time to client devices. The time is derived from highly precise sources, including atomic clocks or GPS systems, which feed time data to the Stratum 0 servers.
In a typical setup, a server within a corporate network can act as a time provider for other devices. This server receives time from trusted sources like GPS or other Stratum 0 servers and disseminates it to devices within the local network. To ensure redundancy and fault tolerance, it is common practice to use multiple time servers.
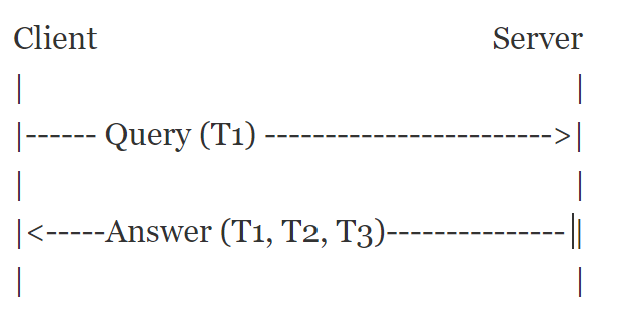
The protocol operates over UDP (User Datagram Protocol) on port 123, facilitating communication between the client and server. The process involves several timestamping steps:
- The client sends a request to the server with timestamp T1, indicating the time the request was sent.
- The server responds with a message containing timestamps T1, T2, T3, and T4, where:
- T1 is the client's timestamp.
- T2 is the server's timestamp when the request was received.
- T3 is the server's response time.
- T4 is the timestamp when the client receives the server's response.
3. The client uses the timestamps to calculate the round-trip delay and adjust its local time accordingly.

If we consider this basic infrastructure service in the context of a corporate network, a server is allocated to work. It can be a dedicated VPS area or a part of the OS space in a container with a running application that processes client requests. And it already receives data from trusted Stratum and provides data to devices in the local network. For fault tolerance, it is common to use several such solutions. As their trusted source can be Glonass-server, which intercepts the GPS signal and transmits the time to the devices.
The protocol's algorithm utilizes UDP on port 123 for communication, facilitating the exchange of messages between the client and the server in both directions:

The client initiates a request to the server to obtain the time, marked as T1, which indicates the time the client's request was sent. The server then logs the request's arrival and responds with a packet containing the timestamps T1, T2, and T3, where T2 records the request's reception and T3 marks the time of the server's reply. Once the network exchange is completed, the client captures the time T4 — when the packet is received — and calculates the network delay as well as the current time.
How do I install and configure NTP?
In Rocky Linux // CentOS distributions, the popular ntpd package has been replaced by chrony, which differs little from its predecessor in functionality and configuration. Let's install the package with the command:
dnf install chrony
To manage the server we can use the chronyc administrator client, which also comes in the installation package. For basic configuration and operation of the service we will need the configuration file at the path:
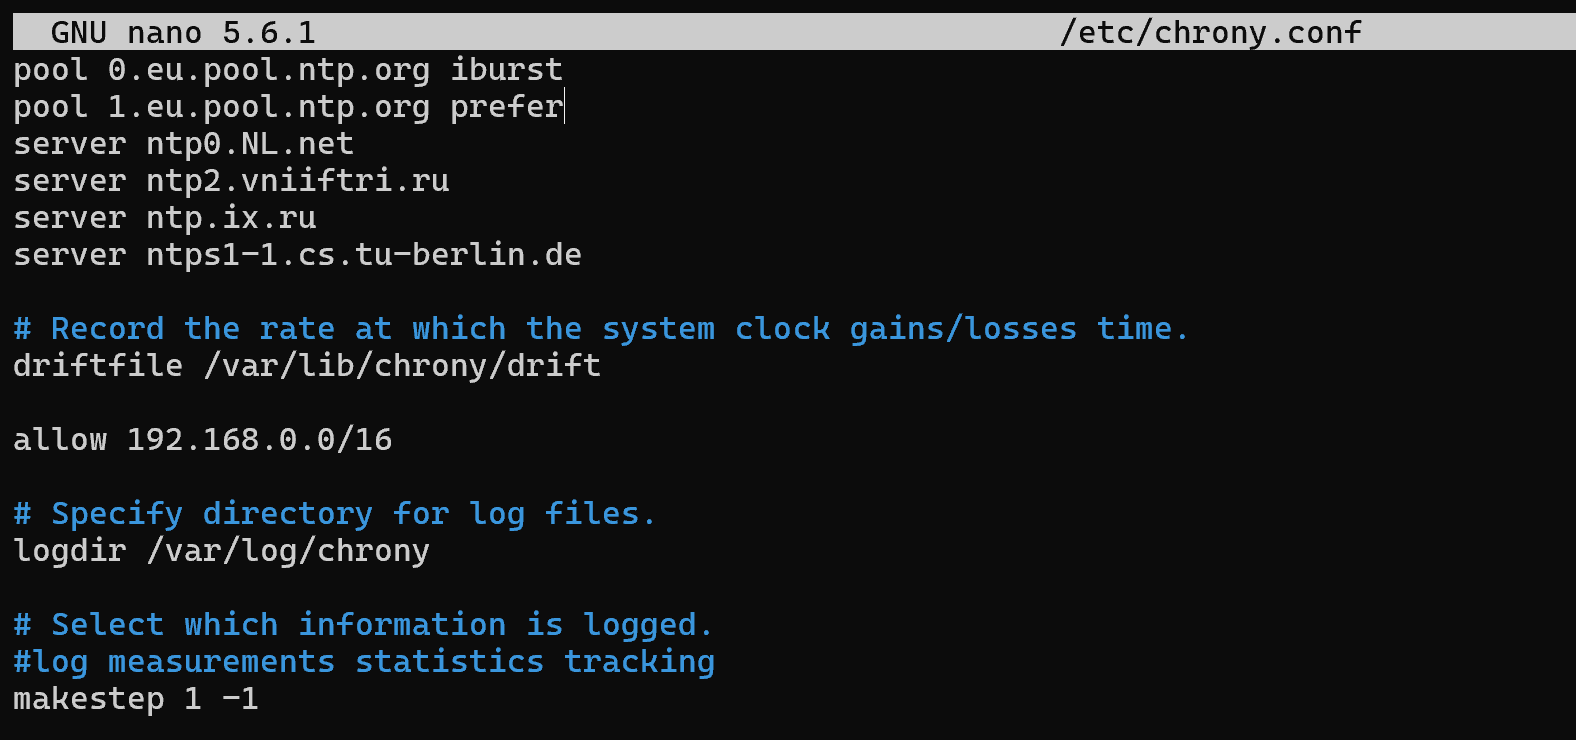
nano /etc/chrony.conf 
For the service to work, it is necessary to specify the servers from where the time should be received, the list of allowed networks and, if available, the logging file. Let's specify the appropriate settings in the file:
# Use public NTP servers

pool 0.eu.pool.ntp.org iburst

pool 1.eu.pool.ntp.org prefer
# Use specific NTP servers for higher reliability

server ntp0.NL.net

server ntp2.vniiftri.us

server ntp.ix.us

server ntps1-1.cs.tu-berlin.de
# Specify drift file to track time deviations

driftfile /var/lib/chrony/drift
# Allow access from local network

allow 192.168.0.0/16
# Log configuration

logdir /var/log/chrony

makestep 1 -1
In this configuration:
- pool entries allow chrony to choose time servers from a reliable pool.
- server entries specify specific NTP servers.
- driftfile keeps track of the time deviation.
- allow specifies which networks are allowed to sync with this server.
- logdir designates the log directory.
- makestep ensures the time is corrected if the discrepancy is large.
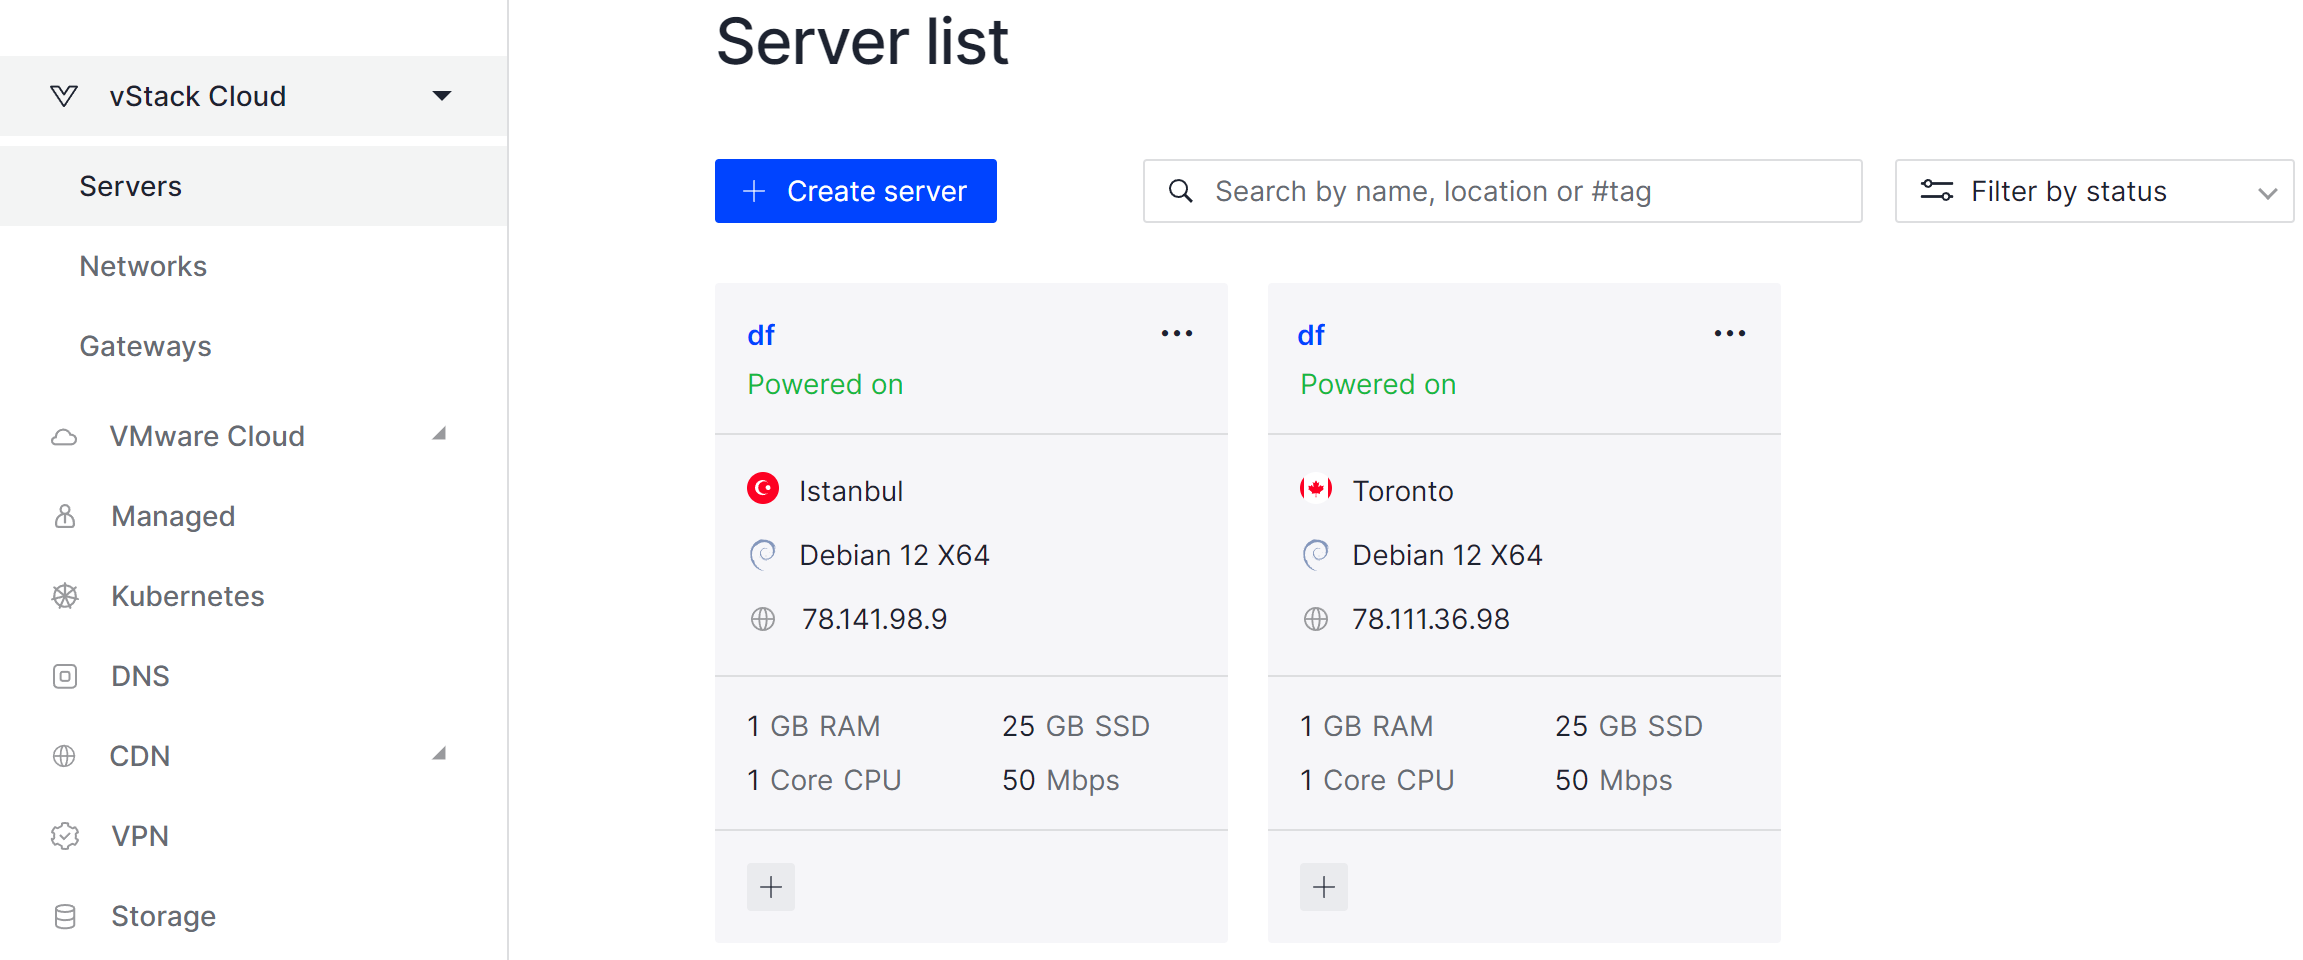
All steps in the tutorial can be performed on powerful cloud servers. Serverspace provides isolated VPS / VDS servers for common and virtualize usage.

It will take some time to deploy server capacity. After that you can connect in any of the convenient ways!
Back to configuring our service, once the configuration file is written and saved, we need to reboot it:
systemctl daemon-reload && systemctl enable --now chronyd
To verify that the NTP service is functioning correctly, use the chronyc sources command to display the NTP servers from which your system is receiving time data:
chronyc sources
The list shows the stratums or tiers from which our server receives time information. The list lists the number of server tiers from which we receive data and calculations of the delay time. As you can see in the figure, the first one has 12 ms and the second one has 115 ms, respectively the utility will choose the source with less delay. If you write the command date, you will notice that the time still does not coincide. It is necessary to change the time zone, for this we will display the list of zones and select the one we need:
timedatectl list-timezones
After that we will select the required one with the following command:
timedatectl set-timezone Asia/Tokyo && date 
Great, after you need to configure the client, so install the chrony package:
dnf install chrony && nano /etc/chrony.confGoing to the file it is necessary to specify our created server:
server 192.168.1.2 iburstRestart the service and put it on autorun:
systemctl saemon-reload && systemctl enable--now chronyAfter that you can also check the work through the chronyc utility:
chronyc sourcesConclusion
Maintaining accurate time across devices in a network is vital for the proper functioning of many systems, including security protocols, monitoring tools, and event logging. By setting up NTP using chrony on Rocky Linux and CentOS, you can ensure that your network devices remain synchronized, improving the reliability of your systems. Whether you are setting up a simple corporate network or managing a large enterprise infrastructure, time synchronization is an essential service that cannot be overlooked.


