This infrastructure service is an integral part of the corporate network and security subsystem, allowing to implement authorisation, content filtering, as well as being a gateway for users to control visited resources.

For full and secure functioning of the information network there are many infrastructure services that ensure its performance. One of them is a proxy, which is an intermediate node. Its task is to pass through itself the connection and perform its processing: cache requests and responses, perform SSL Bumping, authenticate the user in the network and filter network packets.
In this article, let's look at one of the examples of such a service and configure it!
What is a Proxy?
Proxy is an intermediate node, the main purpose of which is to process passing traffic and pass it on. In corporate network segments it is used as a single network exit point for users, which allows authorisation and control of actions. As described above, its functionality to control traffic is almost unlimited:
- SSL bumping;
- Request caching;
- Client authentication;
- Traffic sniffing;
- Control of visited resources.
And it's logical because user traffic is literally spread over the network infrastructure and at such times it is very difficult to track it, so the single point fixes it. Schematically, the algorithm of work looks like this:
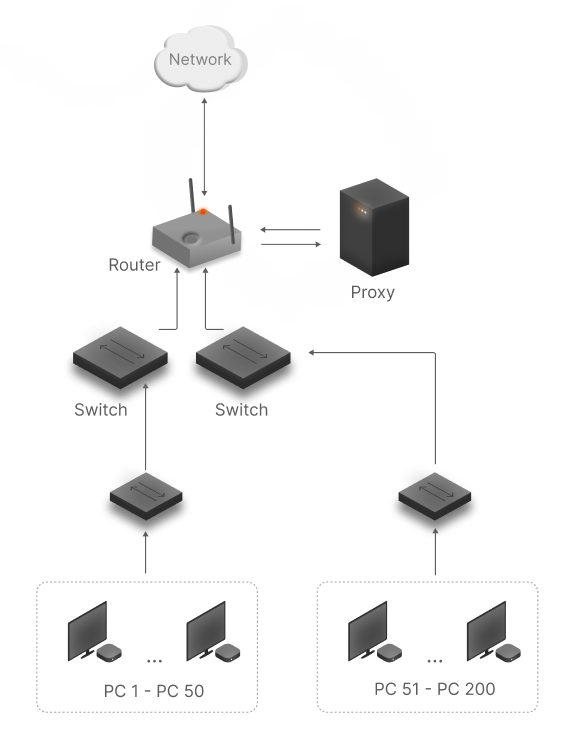
However, apart from the corporate segment, proxy allows anonymising network traffic by substituting the sender's address inside the packet. Such functionality relative to existing technology is used by hackers or and people who hide their digital footprints. Classically, by building a chain of proxies, they are also called proxy-chain, which allows you to hide yourself behind several network cardons.
But how is the redirection of traffic to a single point technically realised? It's simple, if in case of reverse-proxy DNAT is responsible for this, which by rule will direct to the required address and port, then in this context forward-proxy will establish a connection with the server on the port in advance and within this connection the client will transmit the required packets in the payload segment.
Simplified configuration (without authentication)
To work with the service, let's install all the necessary packages and dependencies:
apt update && apt install squid -y 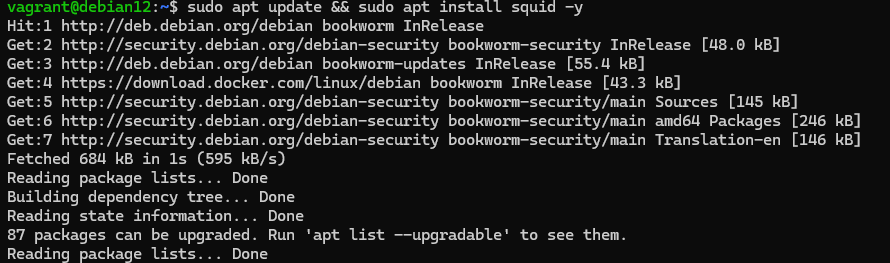
Classically, the server configuration file is located at the path /etc/squid/squid.conf:
nano /etc/squid/squid/squid.conf Let's look at configuring several server functions, starting with the simplest and most basic one. Remove all the contents of the old configuration and write the directives:
acl mynet src 192.168.1.0.0/24

http_access allow mynet

http_access deny all

http_port 3128

cache_mem 256 MB
Where each of these has different functionality:
- acl src - a named list of ACLs specifying the network segment;
- http_access allow - permission to connect the local network to the proxy, because by default the connection is prohibited. This permission also allows to work via http;
- http_port - port on which the proxy will hang;
- cache_mem - allocates cache memory for caching requests.
After that save the file and restart the service and check its operability:
systemctl restart squid && systemctl status squid && curl -x 'http://ip-proxy:port-proxy' 'target'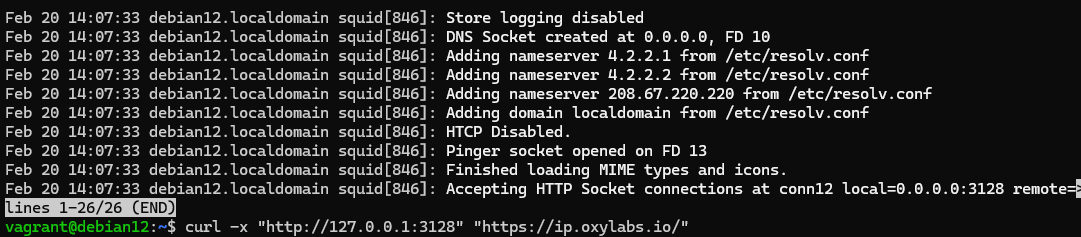
But if you take such a machine outside, it will most likely become part of the infrastructure to mask someone's DDoS or other attack, so authentication is required!
Classic setup with authentication
To protect the proxy server, we will use the classic HTTP authentication form, with the help of a pre-installed module. First, let's form an account under which the user will be authenticated:
sudo apt update && sudo apt install apache2-utils sudo htpasswd -c /etc/squid/passwd 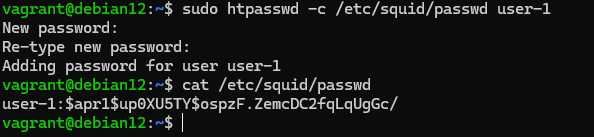
Actually in this context a proxy is a web service that accepts incoming connections and therefore it is possible to use authentication modules of different mechanisms and protocols. Including PAM, which extends the level of capability with its library base:

In order for authentication to start working let's go to the configuration and set the parameters, policies for it:
acl mynet src 192.168.1.0/24

http_access allow mynet

http_port 3128

cache_mem 256 MB

auth_param basic programme /usr/lib/squid/basic_ncsa_auth /etc/squid/passwd

auth_param basic realm 'Proxy Authentication Required'

acl authenticated proxy_auth REQUIRED

http_access allow authenticated
Let's leave the upper block unchanged, as it sets the network segment policy, let's consider the written block below. The auth_param directive sets the authentication parameter, a library to verify the user with our credentials in the first line, in the second line before the verification itself. On the third line, the acl proxy_auth parameter means there will be validation before connecting, and http_access applies this previously written rule.
Let's check the configuration after restarting the service:
sudo systemctl restart squidLet's try to connect without an account and then immediately with one:
curl -x 'http://ip-adders:port' 'target-url' && curl -x 'http://username:passwd@ip-adders:port' 'target-url'
As you can see as a result, the authentication was successful and the web server returned a correct response. But what if in addition to authorisation and user control, you need to sniff traffic and see what employees are doing and searching for via SSL?
Advanced configuration with SSL-Bumping
This configuration will allow you to implement the substitution of the original certificate for the actual signed one, it should be added to the trusted ones for all devices by group policies. The communication process itself will look as follows:
- A client connects to an HTTPS site via Squid.
- Squid intercepts the connection and establishes its own encrypted connection to the client.
- Squid establishes a separate encrypted connection to the target server.
- Squid decrypts the traffic between the client and server, and can filter or log it.
- Squid transmits data to the client signed with its certificate.
To get started, check if your proxy server has this functionality, as builds are different, ssl-bumping may be missing somewhere:
sudo squid -v | grep '*-ssl*' 
If you don't have such a feature, then finish installing the software:
sudo apt install squid-openssl And proceed to create a certificate using the utility:
 /usr/lib/squid/security_file_certgen -c -s /var/lib/squid/ssl_db -M 4MB

chown -R squid:squid /var/lib/squid/ssl_db
Also don't forget to configure the config for connection bumping:
http_port 3128 ssl-bump cert=/var/lib/squid/ssl_db/myCA.pem key=/var/lib/squid/ssl_db/myCA.key

ssl_bump peek all

sslcrtd_program /usr/lib/squid/security_file_certgen -s /var/lib/squid/ssl_db -M 4MB
After that save the configuration and restart the service, the proxy should start swapping certificates. Note that some sites are protected from MitM by an additional check at the http certificate level in memory and if it does not match the original one, the connection is blocked, which can cause problems for clients on your network. In such cases, an exception can be written for them. If you don't have sufficient resources than you can perform actions on powerful cloud servers. Serverspace provides isolated VPS / VDS servers for common and virtualize usage.
It will take some time to deploy the server capacity. After that you can connect in any of the convenient ways. This infrastructure service is an integral part of the corporate network and security subsystem, allowing to implement authorisation, content filtering, as well as being a gateway for users to control visited resources.


