Computer accounts or objects represent devices connected to the AD. They are stored in AD database after connecting to the domain. This is needed to apply different GPOs to them and keep track of their updates if you have WSUS installed. And what is more important establish secure authentication for users logging into Windows.
In order to manage computers, you need domain admin, account operators or delegated rights and do it from workstation with RSAT tools installed or domain controller.
How to Create a Computer Account in AD
Let’s create a computer account using multiple methods. This account can be used to attach a device to it.
Creating Computer Account with ADUC
Run ADUC (dsa.msc).
Go to the OU where you want to store such objects, rightclick on this OU -> New-> Computer:

Or you can do it by clicking on Action -> New -> Computer.
In the New Object – Computer, enter the Computer name and pre-Windows 2000 one according to your naming policy. Choose which group can enter this machine to the domain and click OK.

Creating Computer Account with ADAC
Run ADAC(dsac.exe), rightclick the domain name, select New->Computer. The Create Computer screen appears where you need to type in Computer name, Computer NetBIOS name, according to your naming policy. Specify OU where you want to store the computer item by clicking on Change… You can also specify which group can enter this computer to a domain and protect it from deletion. Click OK in the end.

Creating Computer Account with Cmd.exe
For this task we need to use dsadd.exe. Use the following command to create a computer object in Active Directory:
dsadd.exe computer "CN=WKS033,CN=Computers,DC=office,DC=local"Creating Computer Account with PowerShell
Use the following lines of PowerShell code to create a computer account named “WKS033” in office.local domain.
Import-Module ActiveDirectory

New-ADComputer -Name "WKS033" -sAMAccountName " WKS033" -Path "CN=Computers,DC=office,DC=local"
How to Delete a Computer Account in AD
It is important to delete old computers from your domain to avoid mess in WSUS reports and GPOs application. There are several ways to achieve that.
Deleting Computer Account from AD with ADUC
Run ADUC (dsa.msc).
Go to OU that contains needed computers, from the Action menu, select Find. Type in computername in the Name field and click Find Now… Delete the computer in search results by rightclicking on computer and selecting Delete option.

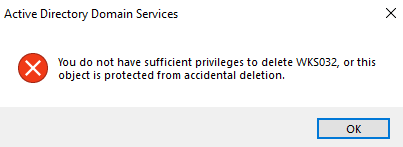
Click Yes in confirmation window. If you receive the following error afterwards:

Rightclick the computer again, and go to Properties -> Object uncheck the “Protect object from accidental deletion” and perform deletion operation again.
Deleting Computer Account from AD with ADAC
Run ADAC (dsac.exe). Switch the left pane to tree view and find the needed OU, type the name of the computer in the Filter pane and press Enter. Select the computer for deletion in the search results, rightclick it and select Delete. Click Yes to confirm.

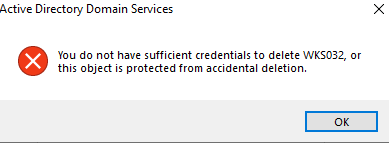
If you receive the error message:

Rightclick the computer object -> Properties and uncheck the “Protect from accidental deletion” option.
After that redo the deletion process.
Deleting Computer Account from AD with cmd.exe
For this task we need to use dsrm.exe. Use it with following parameters to delete a computer account, in our case it is WKS033.
dsrm.exe "CN=WKS033,CN=Computers,DC=office,DC=local"Deleting Computer Account from AD with Windows PowerShell
This task is also can be easily done with Powershell, here is the code for deleting a computer account. In our example computer name is WKS033
Import-Module ActiveDirectory

Remove-ADComputer -Identity "CN=WKS033,CN=Computers,DC=office,DC=local"


