Modern network interactions require security, especially when transferring confidential data.In open networks such as the Internet, information can easily be intercepted. Standard encryption methods based on symmetric keys require secure key exchange, which is impossible in open channels.
The solution was asymmetric cryptography.: it uses a pair of keys — public and private. The private key is kept only by the owner, and the public key can be distributed openly. However, if everyone can create a "public key", how can we make sure that it belongs to the right owner?

This is where certificates come in: they associate a public key with verified information about the owner, whether it's a website, an organization, or a user.
What are certificates and how do they work?
A certificate is a file that contains information about the owner and his public key. In order to avoid substitution, this file is signed by a certification authority. In this case, the recipient already trusts the keys of this center and will confirm the authenticity of the certificate used by the sender. The most common certificate format is X.509. It includes:
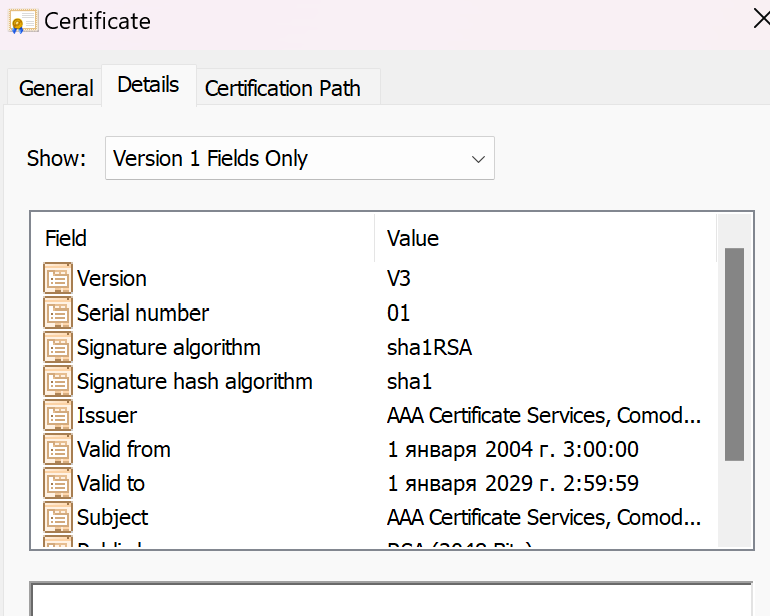
- public key certificate;
- owner's Name (Common Name, CN);
- Validity period;
- digital signature of the certifying center;
- extensions (for example, alternative names, usage policy, etc.).
Also in Windows, certificates are presented as files with extensions:
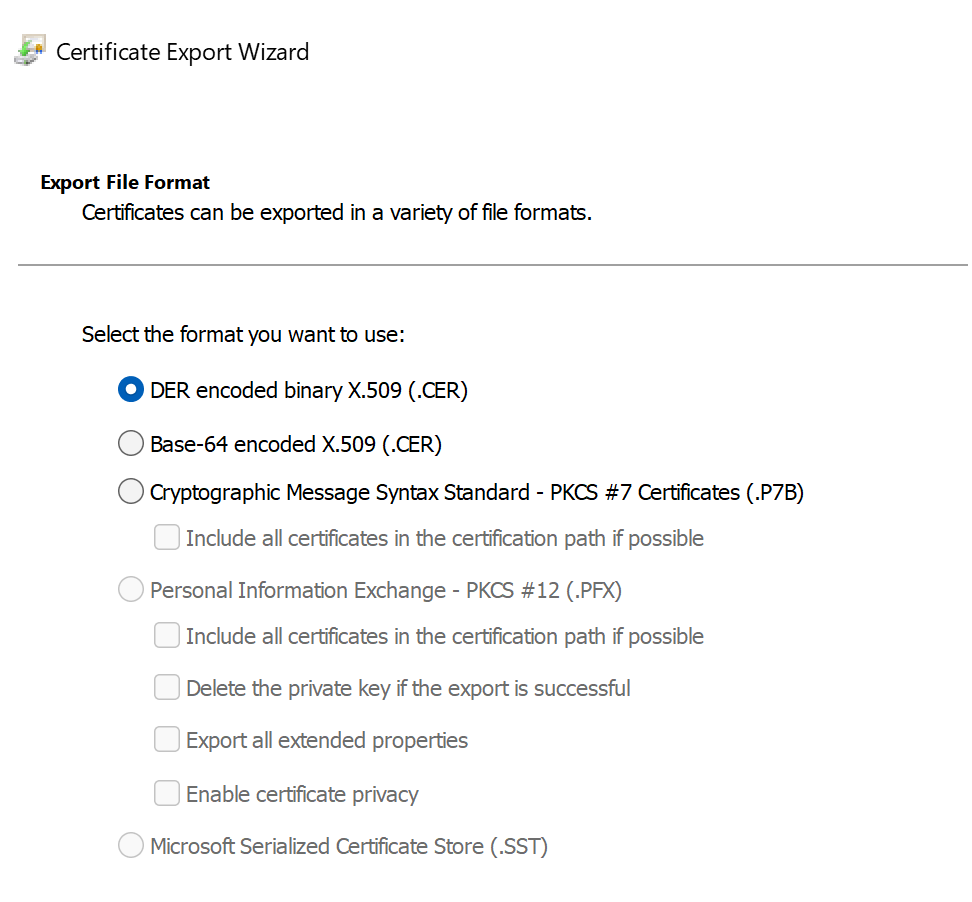
- .cer, .crt — contain only the public key;
- .pfx (or .p12) — contain both a public and a private key;
- .pem is a text format often used in Linux/UNIX systems.;
- .p7b — contains the path from the certificate chain;
- .sst — contains all root and intermediate certificates.
How do I view and install certificates in Windows?
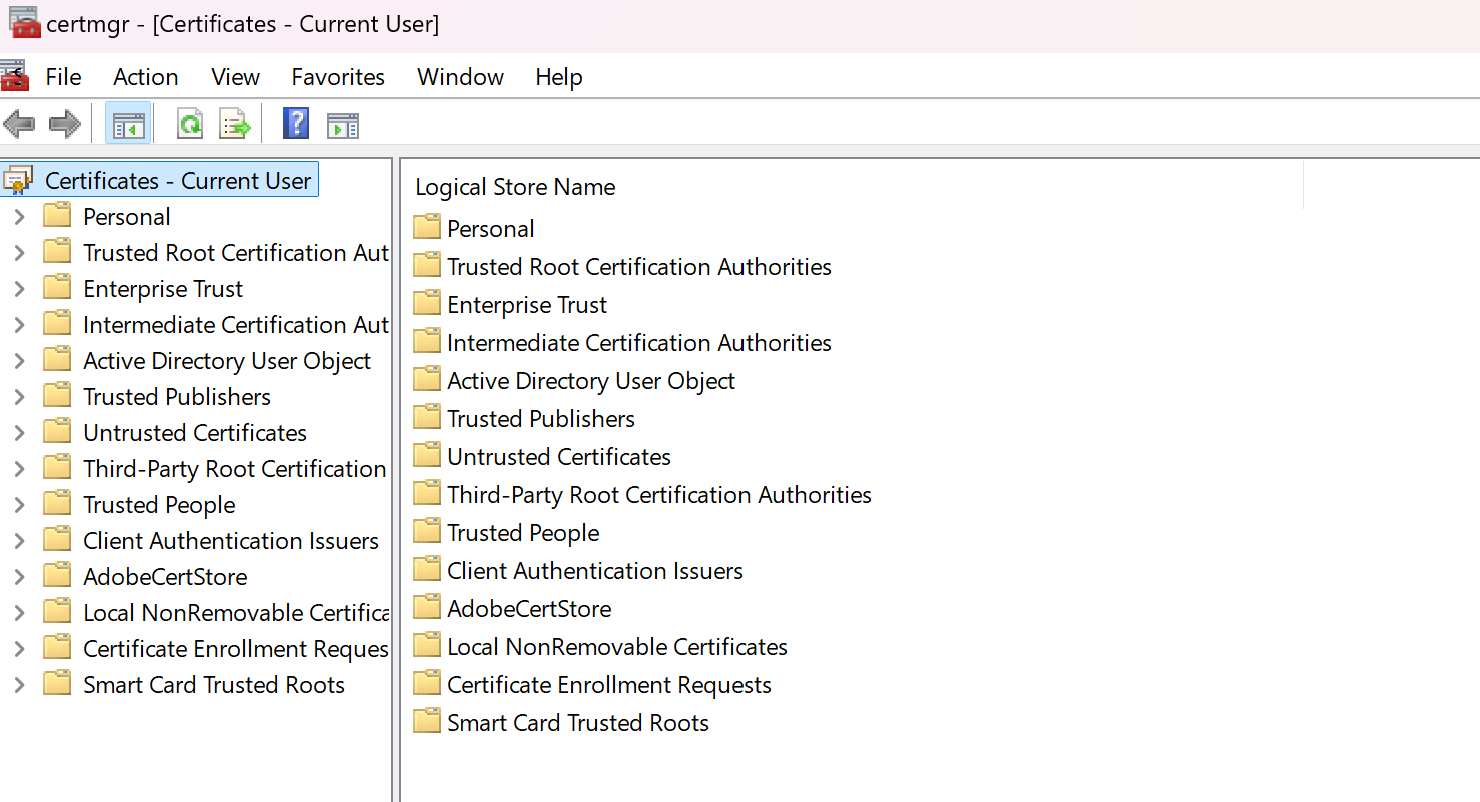
There are several certificate repositories in Windows:
- Personal — contains user or computer certificates;
- Trusted Root Certification Authorities — list of trusted CA;
- Intermediary centers — CA that issued certificates on behalf of the root;
- Other users, services, devices, etc.
Which can be viewed using Windows snap-ins via the search. Press Win + R, type mmc, and press Enter. In the menu, select File → Add/Remove Snap-in. Add Certificates, select for the current user or for the computer.
You can now view and manage certificates in various repositories. They can also be viewed through commands. To do this, open PowerShell: Win+X -> Terminal/Powershell:
Get-ChildItem Cert:\CurrentUser\My

Get-ChildItem Cert:\LocalMachine\Root
To install the certificates, double-click on the .crt or .pfx file. Follow the installation wizard: specify which storage to place the certificate in.
You can also install certificates via PowerShell, if you have the .crt format, then use the following line:
Import-Certificate -FilePath "C:\path\to\cert.crt" -CertStoreLocation "Cert:\LocalMachine\Root"Other commands are provided for the .pfx format:
 $password =ConvertTo-SecureString -String "password" -Force -AsPlainText

Import-PfxCertificate -FilePath "C:\path\cert.pfx" -Password $password -CertStoreLocation "Cert:\LocalMachine\My"
How do I create a self-signed certificate?
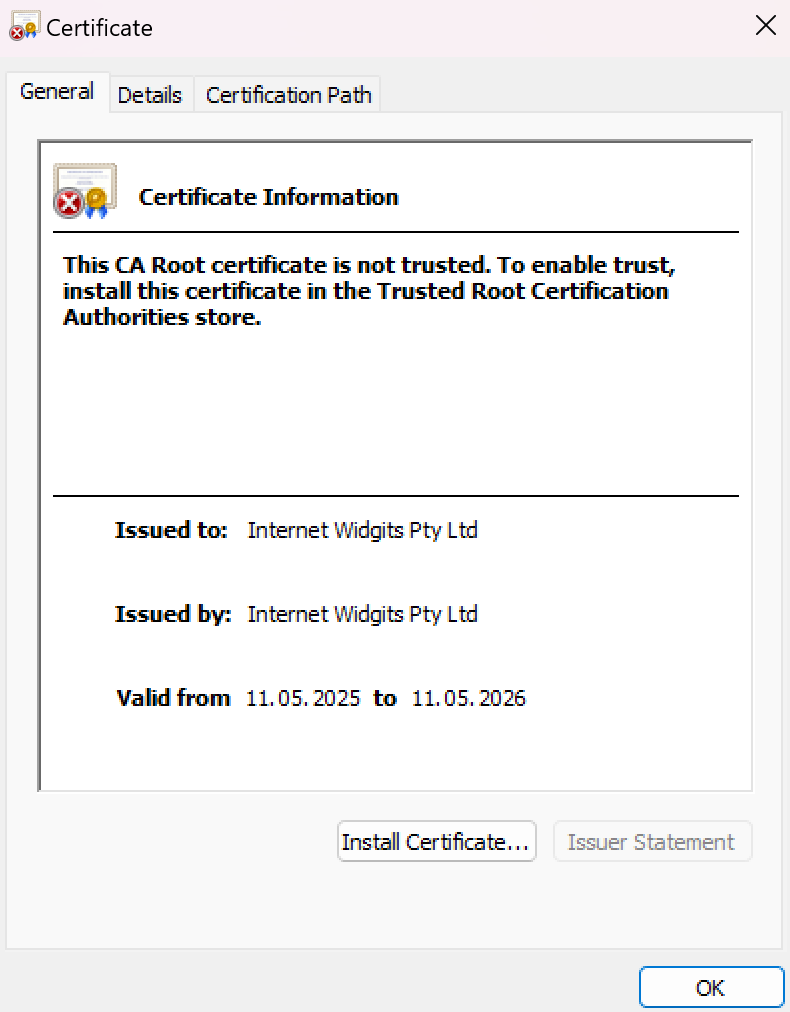
The self-signed certificate is used in test and internal environments. It is created without the participation of a certification authority:
New-SelfSignedCertificate `

-DnsName "test.local" `

-CertStoreLocation "Cert:\LocalMachine\My" `

-FriendlyName "My Self-Signed Cert" `

-NotAfter (Get-Date).AddYears(1)
The use of certificates is the basis of trusted communications on the Internet and corporate networks. The ability to create and manage them is important for both administrators and developers.


