Introduction
At the beginning of 21-st century you may have heard about new revolution in information technologies WEB 2.0 and now we almost go to the WEB 3.0, but let's talk about the tiny detail. What that's mean? WEB or World Wide Web it's technology or global system unify web, DNS and CDN server's, which represent service for searching, using the content: web-pages, web-application and web-services. That system divide on timeline by version 1.0, 2.0 and coming 3.0. But one of the main detail in that schema—webserver. It represent software process queries from clients and form answers due to the configuration and rules on it.
Configuration
We already have installed Apache2 packet in our machine, for starting the web-server we need to check service in the sysetmd, start it and enable autostart:
systemctl list-units | grep "apache2"On the display will pop-up list of units with filtering option apache2, save label of unit and start them by the command below:
systemctl start apache2.serviceThen enable autostart at the boot:
systemctl enable apache2.serviceMake sure that web-server have permission to change configuration by the additional files, for that we can change value AllowOverride to All:
nano /etc/apache2/apache2.conf
In the different versions of Apache2, represent two examples of main config: httpd.conf and apache2.conf. For determine file in your case, use command below:
find / -name httpd.conf && find / -name apache2.conf 
Enabling AllowOverride empowers the server to understand directives defined within .htaccess files found in your website's folders. This capability fosters greater flexibility and customization possibilities on a per-directory basis, thereby elevating both the functionality and security of your web server.
We can now proceed to configure the .htaccess file, which serves as an extension to our existing configuration. Any alterations and settings within this file will influence the configuration outcome. Let's illustrate how this works with a standard configuration.
At the first, we should to activate function which help us override currently settings for the each of sites by the command below:
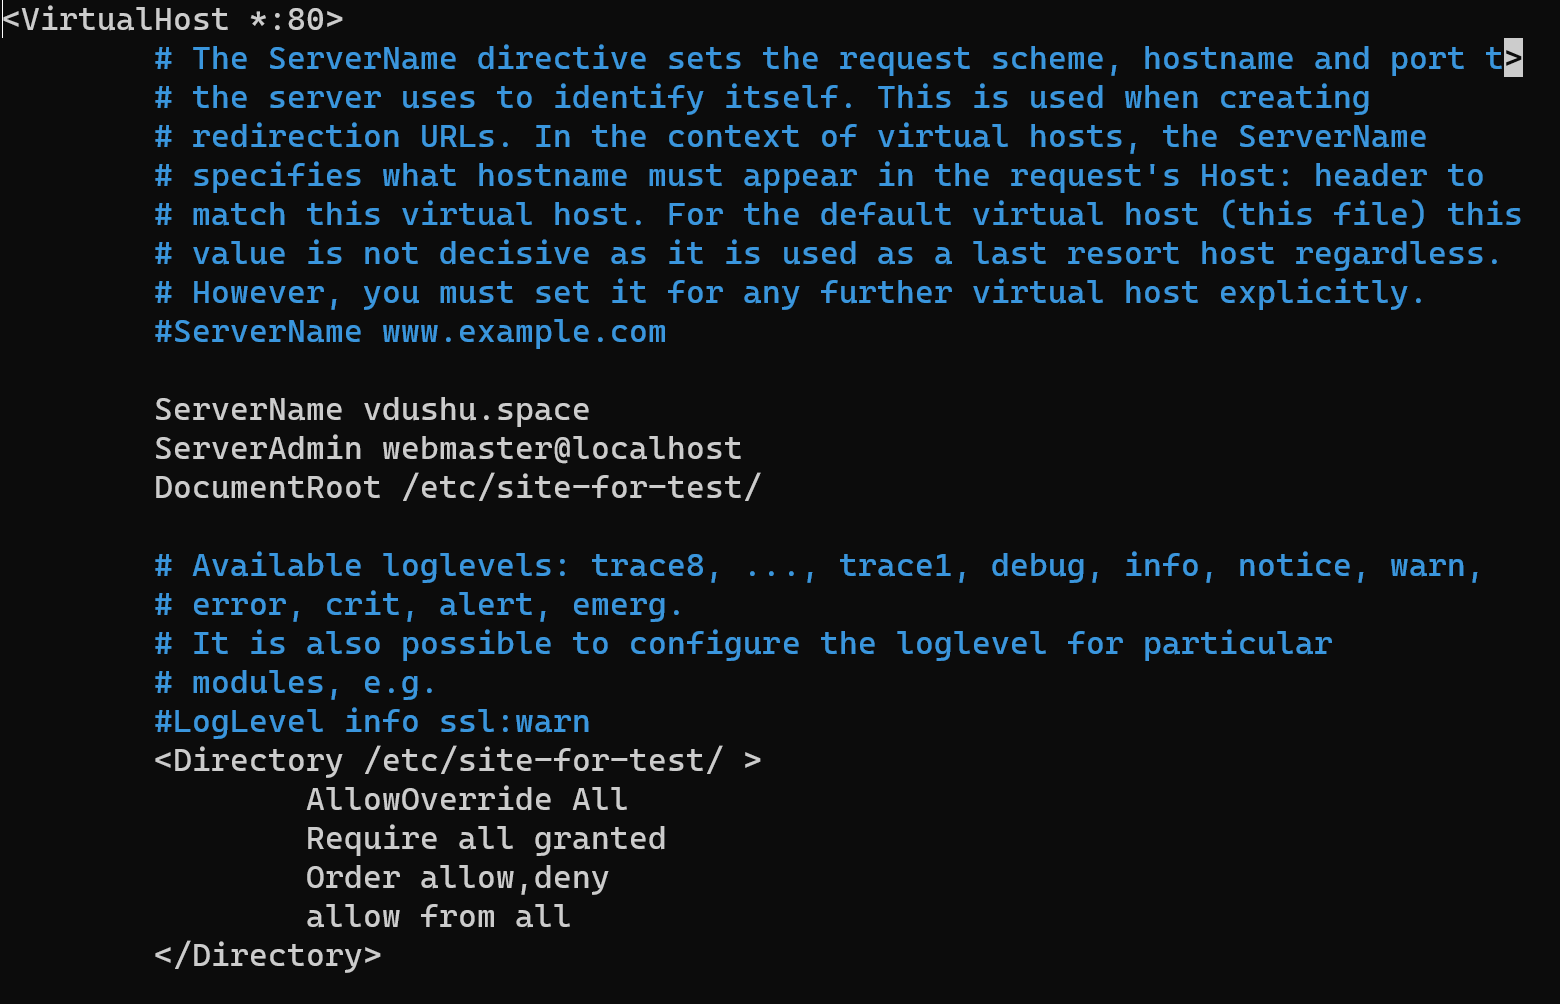
mkdir /etc/site-test nano /etc/apache2/sites-available/000-default.conf 
Modify the ServerName parameter to reflect your own domain and set AllowOverride to the value All. It's important to note that you should have a corresponding DNS record on your provider panel there is record with the public IP address of needed server. Additionally, adjust the "DocumentRoot" which containing the html and another files for your desired website. We're creating a directory named site-test. and main page index.html:
nano /etc/site-test/index.html 
<! DOCTYPE html>

<html>

<head>

	<title>OUR SITE</title>

</head>

<body>

	<h1>ALL WORKING PROPERLY!</h1>

</body>

</html>
The content and structure of your web-page can be different, but the main part should be untouchable. Now, in the same directory, let's generate a new file that establishes a logic of behaviour. Let's create the file:
nano /etc/site-test/.htaccess RewriteEngine On
RewriteRule ^hello$ index.html [L]
On the screen above we turn up rewrite module which we install in the next step. In the follow line, we establish a rule linked to an page and associate to it attribute [L], indicating that it's the final step to run, with any subsequent instructions being ignored. To ensure proper functionality, it's crucial to enable the rewrite module, which is bundled within the Apache2 package, and therefore restart the service.
sudo a2enmod rewrite && systemctl restart apache2
Make sure, that our changes have applied:

Conclusion
In a nutshell, consider the main point's in the configuration of web-server .That allow to control account and access, provide hardening system, gracefully manage errors, and elegantly redirect URLs. That also provide set of settings to create your first web-page, ensuring a truly unique and dynamic online experience.


