In order for a device to access the Internet or to be accessible to others on your network, a number of settings must be made. Virtually every computing device has a network processing module or network card. In this guide, we will write configuration files for them that define how they work, look at different configuration methods, and test them to see if they work properly.
How to set up a network via nmtui?
Currently, there are graphical and textual ways to configure the network interface. The simplest and most intuitive is the nmtui utility. The pseudo-interface allows editing and saving changes made. Before we get started, let's make the changes and update the packages on the machine:
dnf update
Then call the utility by specifying the command, in the following form:
nmtui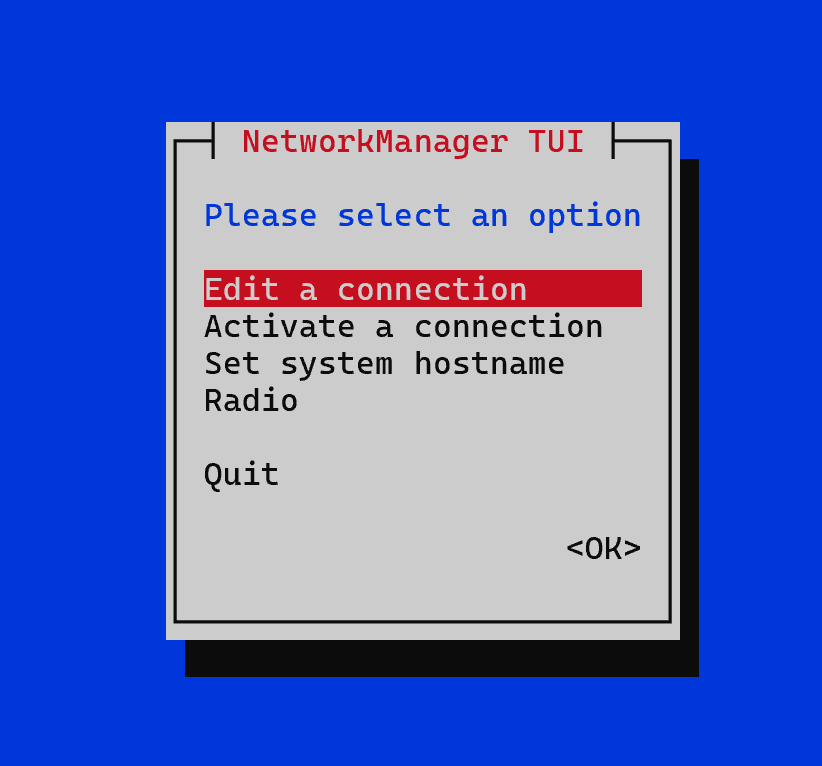
The drop-down menu provides a list of basic functions, to configure the network we will go to the Edit a connection tab:
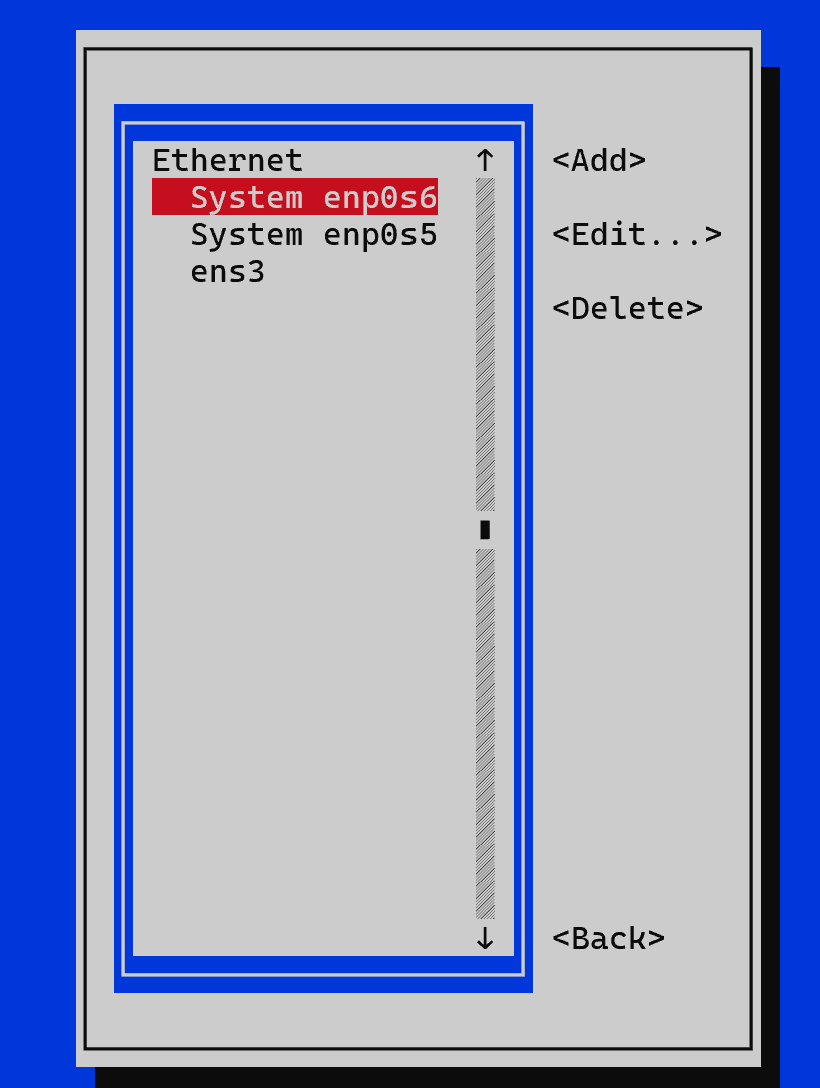
Use the arrows to select the desired interface name and go to Edit. If the interface is connected but there is no configuration file for it, select Add and your connection protocol, often Ethernet. Fill the window with the necessary data MAC address, IP address, Gateway, and other settings. The resulting configuration file may look like this:
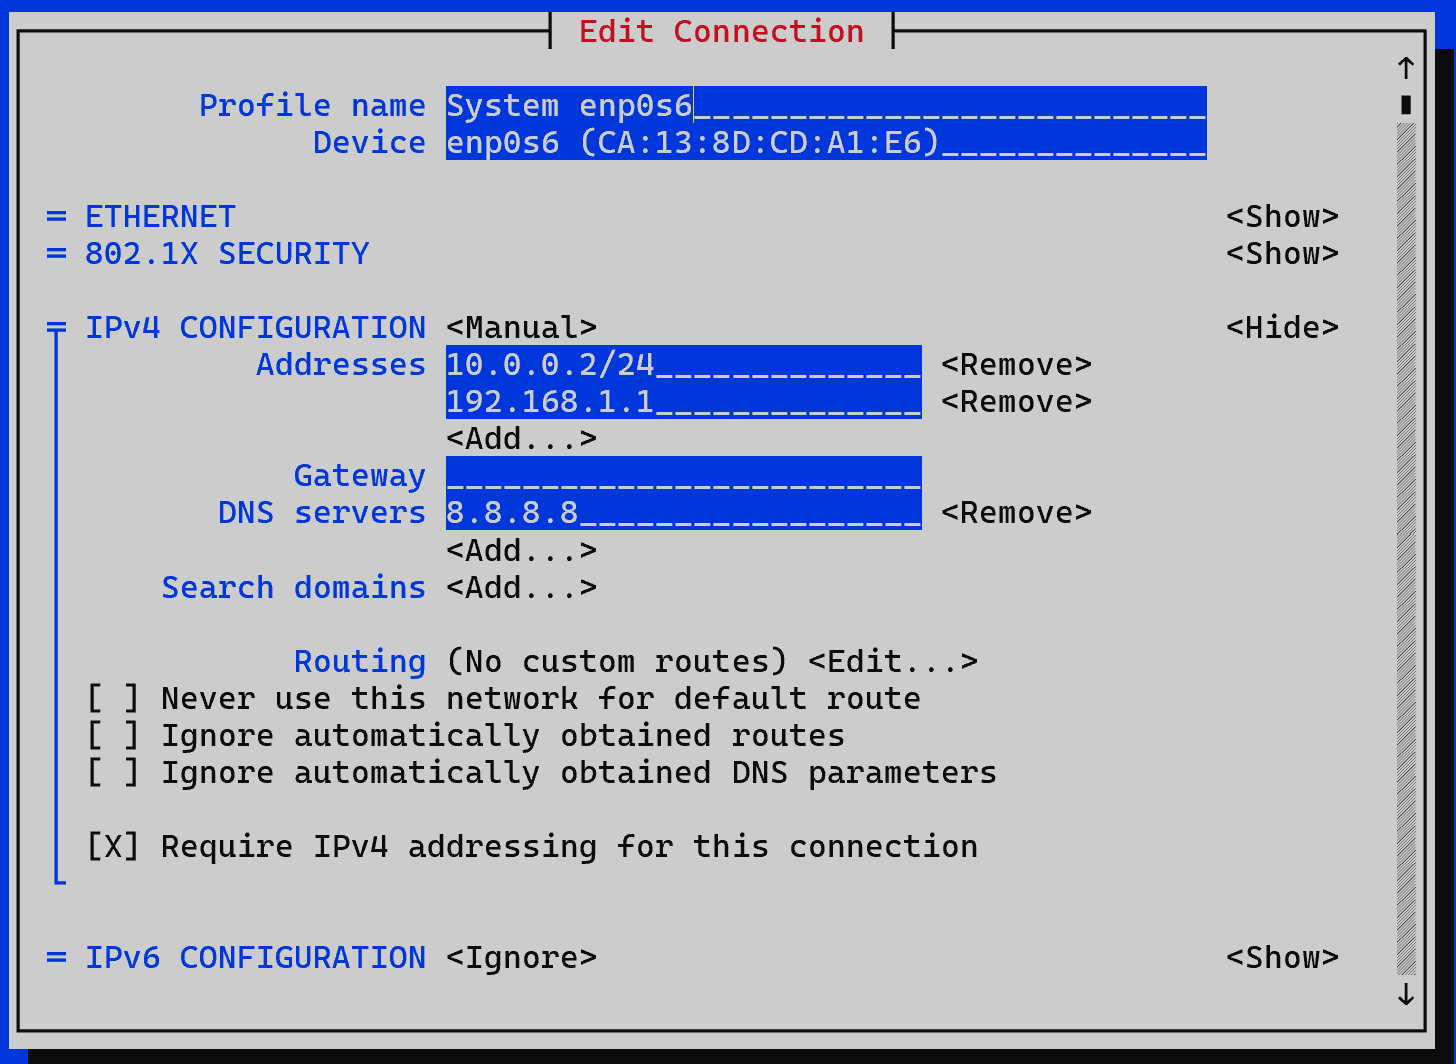
There are fields to fill in:
- Profile name label for the interface, can take any value;
- Device interface name given by the system, if there is no value, it must be entered. To do this, you can use the ip a command;
- IPv4 Configuration is a whole block of settings for IP version 4, the choice between Manual and DHCP(Auto) determines the type of configuration: manually or using a DHCP server;
- Addresses requires the IP address for the current network interface, you can specify more than one if necessary;
- Gateway specifies the default route and allows routing packets outside the device's subnet;
- DNS specifies a server for searching and resolving domain names.
After that you should save the changes and exit to the main menu, then reload the interface in the Activate a connection Deactivate and Activate interface tab.
All steps in the tutorial can be performed on powerful cloud servers. Serverspace provides isolated VPS / VDS servers for common and virtualize usage.
It will take some time to deploy server capacity. After that you can connect in any of the convenient ways!
Set up with CLI nmcli
While the GUI is more intuitive, the CLI is quick to apply settings. To display a list of all interfaces, use the command:
nmcli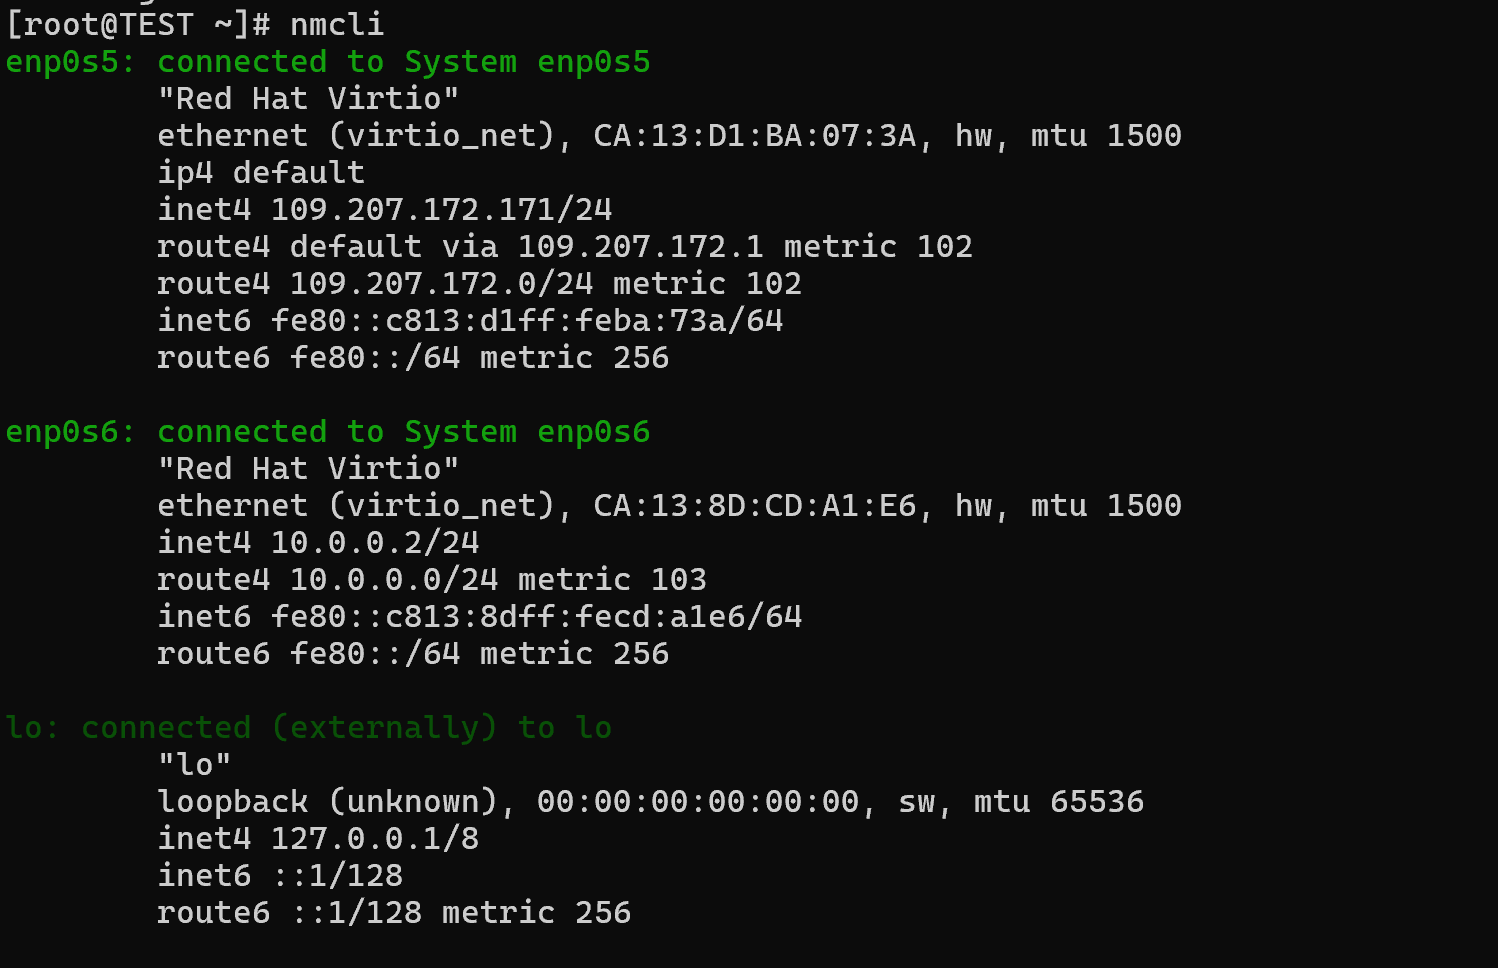
We are interested in enp0s6, although it is already configured, we will configure it again. The order is quite simple, for manual configuration we will write commands:
nmcli con mod "enp0s6" ipv4.addresses 172.16.1.12/24

nmcli con mod "enp0s6" ipv4.gateway 172.16.1.1

nmcli con mod "enp0s6" ipv4.dns "8.8.8.8"

nmcli con mod "enp0s6" ipv4.method manual
To create an interface, you must use:
nmcli connection add type ethernet con-name Ethernet ifname enp0s6To remove an interface you do not need, use the command:
nmcli connection delete enp0s6After that it is necessary to check the network settings via the nmcli or ip a command. For a more detailed configuration of the network interface, it is necessary to use a configuration file via a text editor. However, for basic configuration the solutions described in the manual will work fine.


