In networks, there are two main ways in which an IP address can be assigned to a device: static and automatic configuration. This is an important step because it is where the device identifies itself to other devices on the network by comparing its mask to its IP address. This is how the machine knows what network it is on and understands how to address other devices within its network and beyond.
To avoid the administrator having to run through all the devices every time, the DHCP service was implemented to automate the process. However, it has its own nuances, but let's talk about everything in order.
What is DHCP?
DHCP or Dynamic Host Configuration Protocol is a service that allows you to automatically assign IP addresses and other network configuration attributes to machines on a predetermined subnet. It works quite simply, a client without network settings sends a broadcast packet within its environment with IP address 0.0.0.0.0. After that, the first server that received this packet sends its response with an offerer.
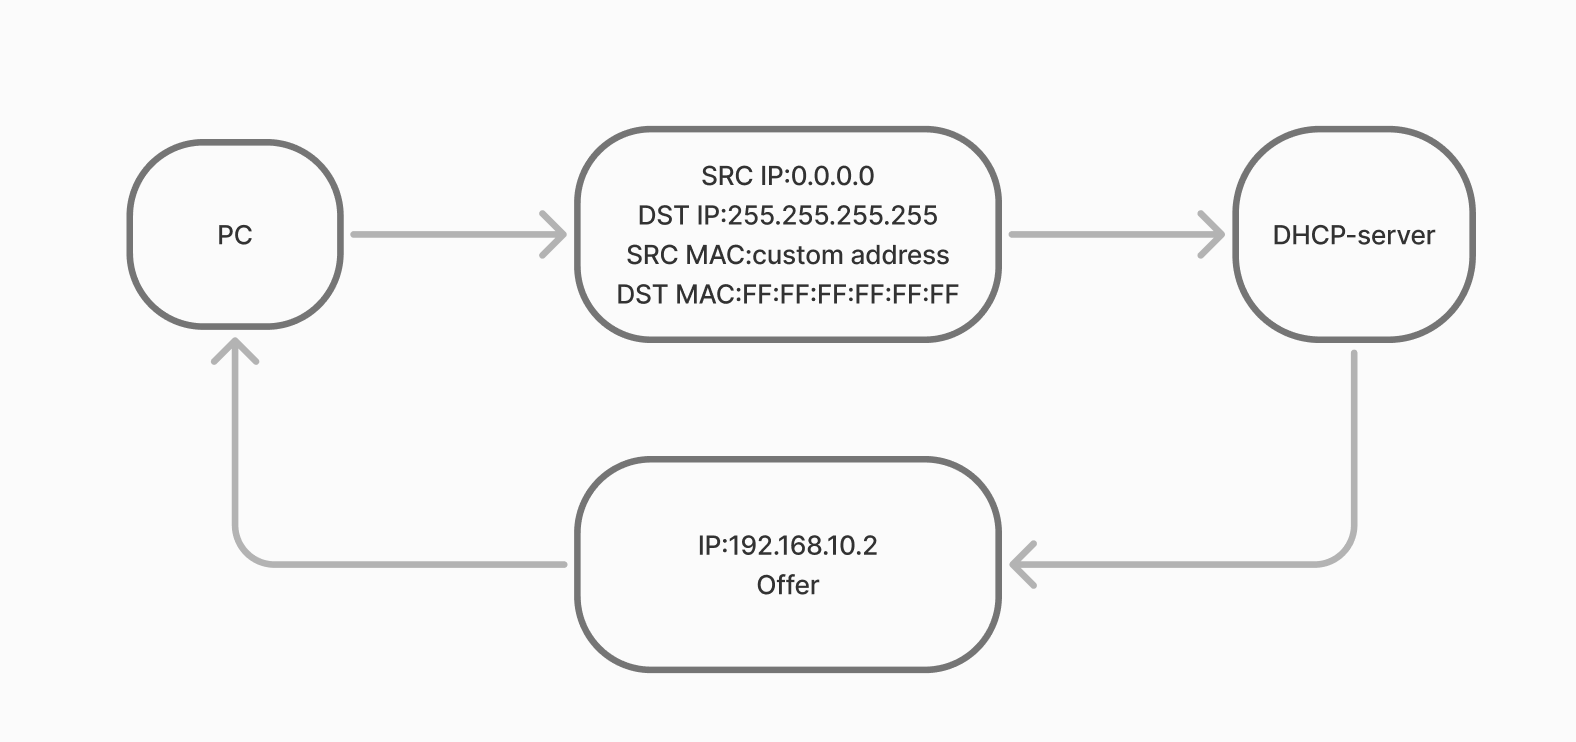
Where it offers to occupy the provided IP address and other network settings, then the client accepts and sends a DHCP confirmation. And the server makes a record that the device has leased it for a period of time, after the expiry of the lease period the address can be extended. The main problem in this case is the possibility of unauthorised server spoofing with Mitm attack or difficulties in network segmentation. It is necessary for the DHCP server to have access to all network environments, which is a threat.
Okay, how do you configure it though? Let's do a quick step-by-step breakdown.
How do I quickly set up DHCP?
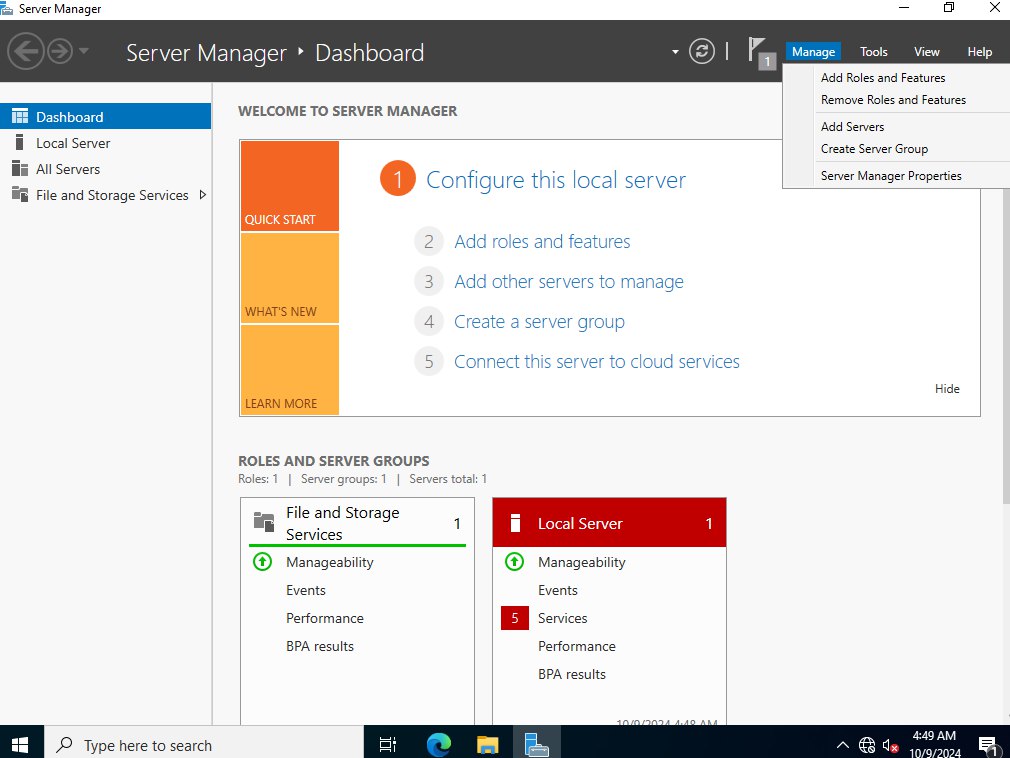
We will configure it on Windows Server, unfortunately, many infrastructure services are not available on regular client versions of the OS, so the choice is limited. Let's go to the search tab or press the Win command key where we enter ‘Server Management’ and launch the utility.

After that a window with settings of the current server will be opened, you need to select Manage -> Add Roles and Features in the upper right corner:
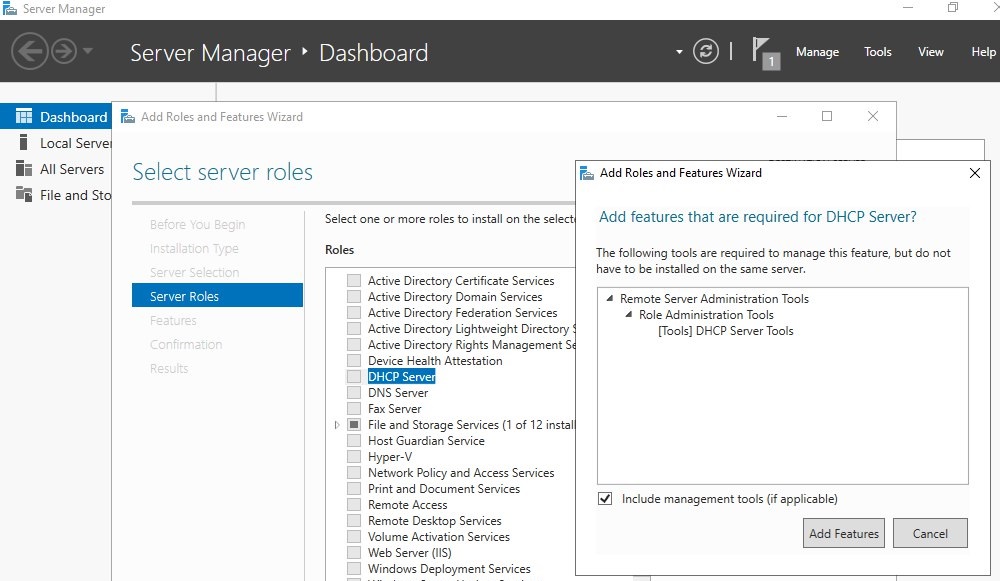
Select the server you want in the Server Selection tab and go below to the DHCP configuration roles:

Then select DHCP from the list of roles that appears and confirm the installation action. To do this, select Add Features:
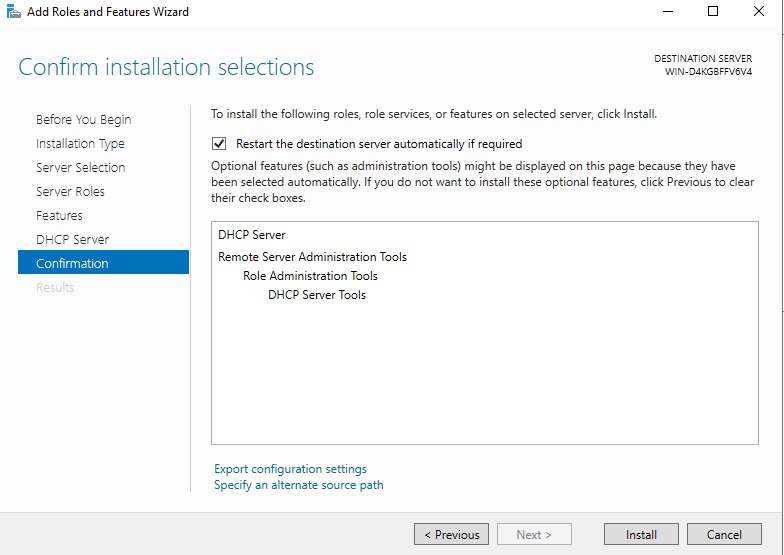
Start the installation process by clicking the Install button and wait for the result of the service:
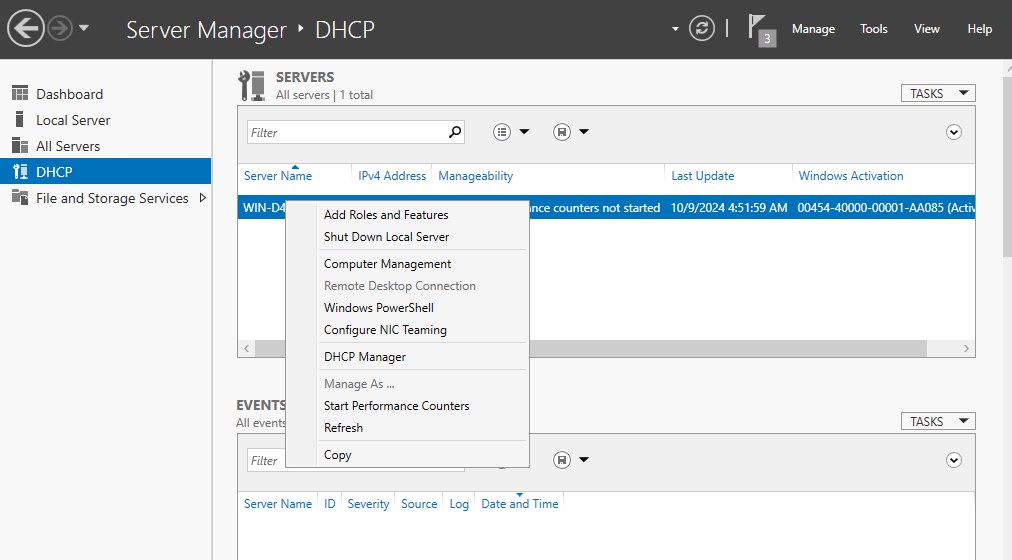
Right-click on the DHCP pad and select Go to DHCP. Repeat the action by clicking on the server bar and select DHCP Manager:
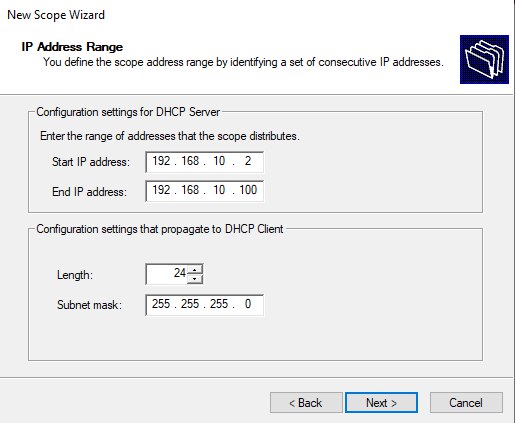
Select the IPv4 line and right-click, select New Scope in the context menu. Configure the corresponding address pool:
As exceptions to the pool, you can select a range of addresses that will not be issued on demand:
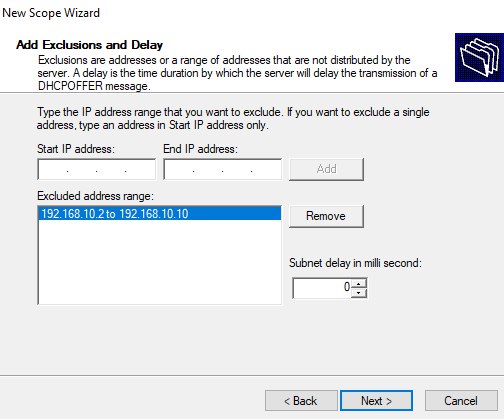
For example, it will be perfect for excluding the pool of static addresses of services, this setting will help to avoid collisions with packets. The next item will be router settings, DNS and Wins server settings, if necessary:

Select the desired Scope and right-click to open the menu, where we select the option to activate the Scope.

Great! Now the DHCP server is configured and provides the service to clients, to disable it open the required menu and select Deactivate Scope. If the service is no longer needed at all, you can also delete the role through the Server Manager panel.
Conclusion
Setting up a DHCP server in Windows simplifies network management by automating IP address assignment and related configurations. By following a structured setup - from installing the DHCP role to creating and activating scopes - administrators can ensure devices receive correct network settings without manual intervention. Proper configuration, including defining address pools, exceptions, and DNS/router settings, minimizes conflicts and enhances overall network efficiency. Regular monitoring and updates further help maintain security and stability of your DHCP infrastructure.
FAQ
- Q1: What is the difference between static and dynamic IP addressing?
A1: Static IP addresses are manually assigned to devices and remain constant, while dynamic IP addresses are automatically assigned by a DHCP server for a limited lease period, allowing easier network management. - Q2: Can I configure DHCP on a Windows client OS?
A2: No, DHCP server functionality is only available on Windows Server editions. Client versions can act as DHCP clients but cannot serve IP addresses to other devices. - Q3: What is a DHCP scope?
A3: A DHCP scope is a range of IP addresses that the DHCP server can assign to clients. You can also define exceptions within the scope for static IPs to avoid conflicts. - Q4: How do I prevent IP conflicts on my network?
A4: Configure exceptions for static addresses, carefully define the DHCP address pool, and monitor leases to avoid overlapping assignments. - Q5: Can DHCP be a security risk?
A5: Yes, if unauthorized DHCP servers appear on the network, they can perform spoofing or MitM attacks. Always secure your network segments and monitor DHCP activity. - Q6: How do I disable or remove DHCP if it’s no longer needed?
A6: You can deactivate a specific scope in DHCP Manager or remove the DHCP server role entirely via Server Manager.


